Make a paper mâché globe

Rate this tutorial
Average: 4.4 (12 votes)

Create your globe in paper mache ! A balloon, a few newspapers, some pretty coloured kraft paper and blue tissue paper are all you need for this activity.

An opportunity to review geography basics: the names of continents and oceans while having fun!

Materials:

Why is the earth also called the "blue planet"?

Earth is a planet with 71% of its surface covered with water — hence this moniker. The Pacific Ocean alone is more expansive than all the land masses!

Preparing the globe

Start by inflating the balloon — not too much or it will become more and more elongated (about 20 cm in diameter will keep the balloon fairly round).

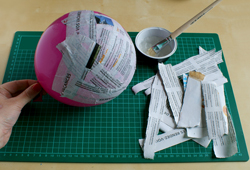
Cut out strips of newspaper and use the wallpaper glue to stick them one by one onto the balloon.

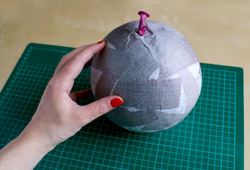
Make sure you go all the way around. The balloon must not be visible apart from the knot sticking out. Add a second layer of newspaper. (To be sure you're applying the second layer evenly, you can choose a paper of a different colour.)

Drying and removing the balloon

To speed up the drying time, place the balloons in front of a heat source (a reasonable distance away). The process will take about 24 hours.

A tip for checking whether the paper is completely dry: Pull or push the balloon slightly. If it's completely dry, you'll hear little crackling sounds. This means the glue is definitely dry and the balloon can be peeled away from the paper!

You can now pierce the balloon while holding the knot, and then remove it. Close the hole by gluing a few pieces of paper over it.

Creating the oceans

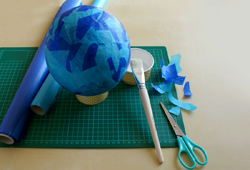
Once the globe is dry, cut some pieces of turquoise and ultramarine tissue paper to stick on with the glue and brush. (Don't use an overly runny glue as this will soften the paper mâché structure. Ideally you should use a white/vinyl glue.)

Leave to dry for several minutes.

Drawing the continents

Print the PDF of the continents.

Using the tracing paper, redraw the continents on the yellow kraft paper. The country outline can be simplified a little to make it easier to cut out with the scissors.

Do not cut out the "interior" seas as this would be too tedious. (See the quick tip under "Creating the seas".)

Gluing the continents

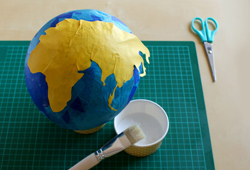
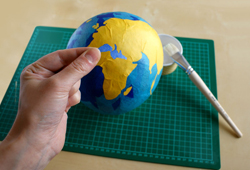
Once the continents have been cut out, apply glue to the globe and place the yellow kraft paper on it.

Using a brush, flatten the paper so that it moulds to the round shape of the globe. The paper should become damp and form a few wrinkles that you can reduce to a minimum with the brush.

Creating the seas

Tip: As the seas are inland and more difficult to cut out with scissors, you can trace their outline on the ultramarine tissue paper (the darkest shade) before cutting them out and gluing them into place on the yellow kraft paper. This will give you a sufficiently detailed globe.

You can mark the names of the oceans and continents.

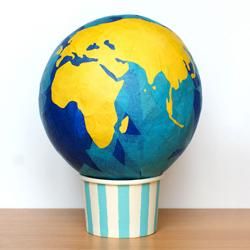
Then glue or position the globe on a little pot to stabilise it. Or hang it up!