
Make 3D toys out of paper

Rate this tutorial
Average: 1 (1 vote)

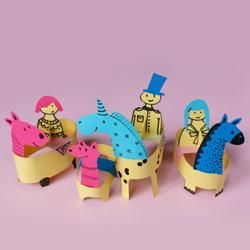
Make animals and delightful characters out of paper: simple cutouts and a few dabs of glue to create fantastic creatures!

Children can stretch their imagination and compete for originality both in terms of form and artwork.

Materials:

  • Canson® Vivaldi® paper (185 g/m²) A4 format: light yellow, turquoise blue, azure blue, fuchsia, rose petal
  • Thin black felt-tip pen
  • Adhesive tape
  • Glue
  • Scissors

Cutting out the bases

Cut out strips of light yellow Canson® paper to the width of the sheet and at different heights.

Draw legs along this strip.
 

Assembling the bases

Cut out the legs and decorate them.

Roll the strip back on itself and close the circle produced using a piece of adhesive tape or a drop of glue.

Creation of animal heads

Using other colours of paper, cut out animal heads - these can be real or imaginary.

If the base of the neck is too large, add a small tab that will allow optimal gluing around the curve of the circle. Decorate the animals using a black felt tip.

Final assembly

Glue the animal heads to the inside of the circles.

To reduce the curve of these bases, create a stand: a rectangle with two folds that can be glued onto both sides of the circle. Vary the shapes and decorate these fun creatures with geometric patterns for example.

Figure creation

Draw characters on light yellow paper and cut them out.  Add colour accessories: hair, headgear, hats, bow ties etc.

Using the same paper, create supports for them: try a half oval cut to the centre, also cut a slot at the bottom of the characters, these can also be attached to the back of the animals.

This assembly technique can also be used to create entire figures, trees, bushes etc... a whole range of accessories to complement great stories