Here are a few tips and tricks for transforming your drawings into manga. Then it's up to you to find your own style!
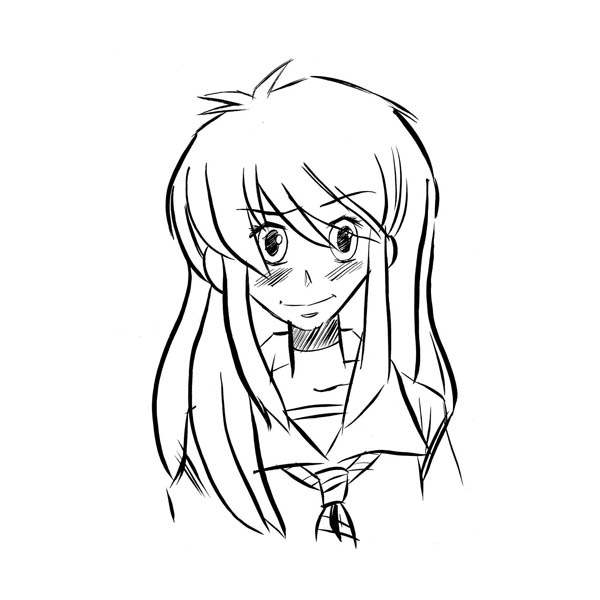
1. Drawing the girls
Most of the time, manga characters have triangular faces - especially the girls. Don't hesitate, therefore, to make their chins nice and pointy.
- The nose: a simple shadow. This shadow is easy to draw but often difficult to place! Draw it right in the middle of the face, just above the mouth.
- The big eyes: Go for simplicity. A perfectly oval shape with an oval iris in the middle taking up half of the total surface of the eye. One small circle of reflection is enough.
- The hair: Give her hairstyle volume by drawing some lively curls. Don't worry about overdoing it!
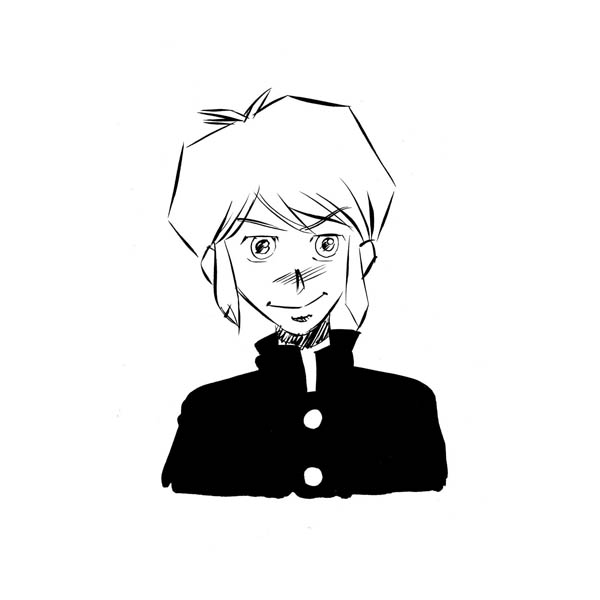
2. Drawing the boys
- The boy's face can be just as triangular as the girl's, but his eyes are smaller and "squarer".
- Draw a slightly longer shadow for his nose: this is how you depict a thicker, boy's nose.
- The haircut: Even if there are strands going every which way, it will be more angular and thus more masculine (which doesn't mean you can't create some wild-looking hairdos!). The Japanese adore the long sideburns framing the faces of manga characters. These are easy to draw and look great, so feel free to go all out!
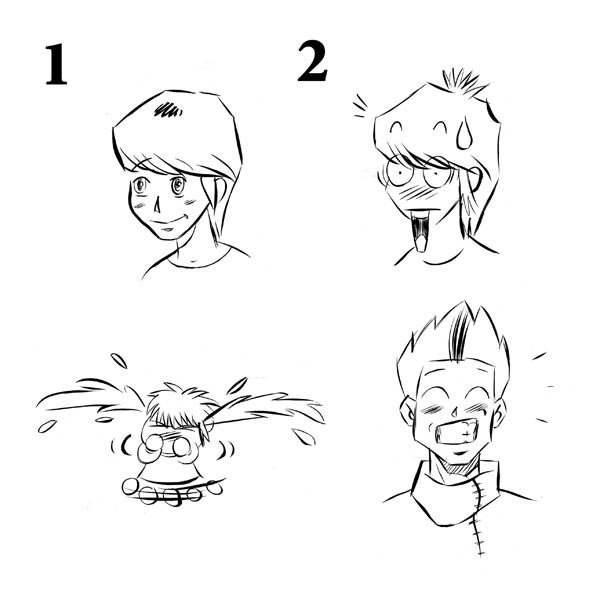
3. Drawing the expressions
Manga characters are extremely expressive. It is quite common to see a character go from expression 1 to expression 2 when it is surprised. To create an element of surprise, simply bring out the eyes and mouth and replace the nose with a few quick strokes. Add a crucial bead of sweat on the forehead (in general, a symbol for embarrassment) and your character is good to go! For maximum effect, the change must be sudden and short-lived.
The transformation of a normal character into an SD (super deformed) character, or one that is super small, cute and rounded, is just as spectacular. An SD character is an extremely exaggerated mini version of the original character. To make one, draw a perfectly round face, the smallest of hands, nearly non-existent legs and a vaguely similar haircut.
This transformation is usually brought about to convey a strong emotion, and is short-lived. Use SDs sparingly to make them all the more effective.
Just like with the previous image, you can enlarge the mouth to heighten the character's expression as you see fit. Here, the smile is so big that we don't even need to draw the eyes - simple slits will do the trick.
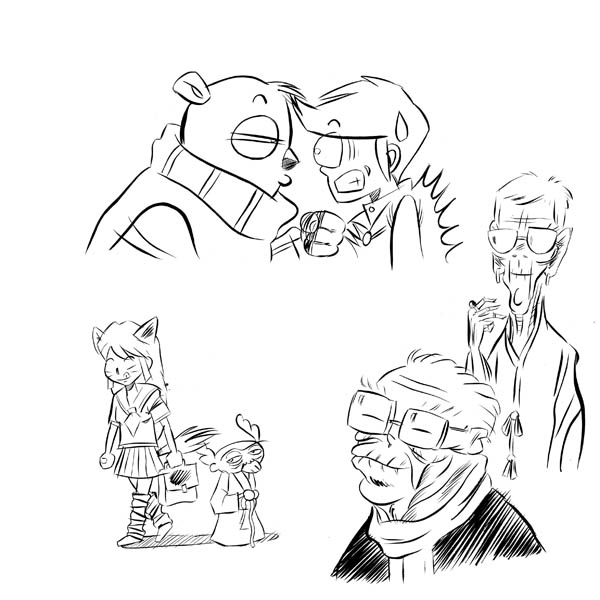
4. Mixing the characters
In the same way that mangaka (manga artists) often depart from traditional styles to convey the emotions of their characters, they also enjoy incorporating the shapes and styles of a variety of different drawings into one single story: an animal and a human being can (almost!) live harmoniously in the same world, or a young girl can have a grandfather who is 80 cm tall and drawn in a contrasting style to emphasise their differences, etc. Such things are unheard of in classical comic strips!
This brilliant method used by the majority of mangaka allows them to portray a character in a box and efficiently play with departures from traditional styles.
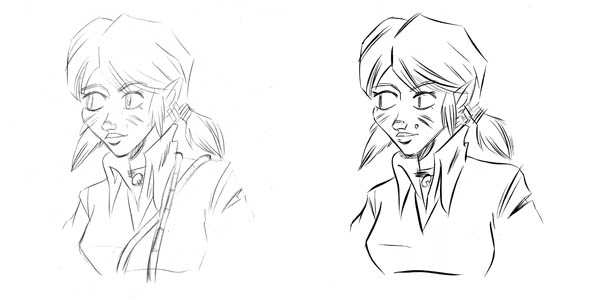
5. Ink the drawing
It is vital that you apply ink to your drawings like a real mangaka does, even if this is not the easiest part of the process. It is only when your drawings have been inked that they are really finished.
The material: Canson®lavis technique paper, 1 pencil and 1 new, high-quality .3 or .5 mm marker.
Draw your character with a pencil, then go over the lines with your fine point marker.
- Try to push through your strokes so your drawing is as energetic as possible (the trademark of the manga style).
- All of the lines should not be of the same thickness: press down on your marker harder for the most important lines, such as the outline of the face or the hair. The lines you draw for little details like shadows or strands of hair should be finer and more wiry.
- Feel free to add any details which are missing from the sketch, such as small shadows. Likewise, take this opportunity to delete those elements of the drawing you do not feel are necessary: in this example, the character's shirt is not completely inked.
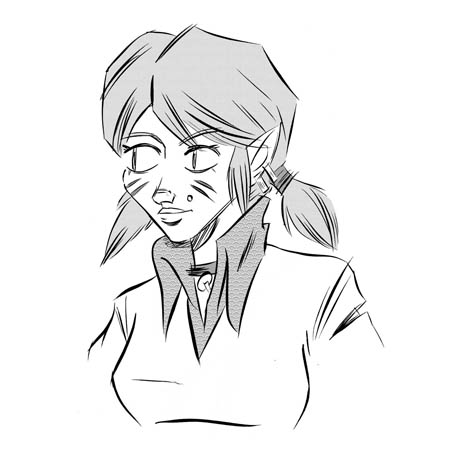
- Do not erase the pencil right away, for this will lead to smears: let your drawing dry for as long as possible.
- It is only after you have erased the pencil that you can use black ink to darken large parts of the drawing.
- If you have small touch ups to do where your lines got "out of control", feel free to use white gouache or even some correction fluid.
6. Placing the panels
99% of mangas use panels to grey out certain areas of their drawings. Two solutions:
- If you are a computer whiz, you can scan your work and add the panels in Photoshop.
- Otherwise, you can use real panels. There are 2 types:
"Decal" style panels which you can apply to your drawing by rubbing them on the part of the sheet where the panels are needed.
Classic "automatic" panel sheets. These stickers are cut directly onto your drawing. This is the most efficient technique but also the most costly one! If you make a mistake while cutting your panel, simply start over again and use the scrap for a smaller area of your drawing...
A tip
While panels are sure to make your drawing stand out, be careful not to use too many. The final product could actually be hard to digest!
Recommended product:
Graduate Manga
See also :
For kids
Activities for kids: Graffiti
Explore more tutorials on this technique
For kids
Making an Easter bunny
For kids
Make a present for Mother's Day
For kids
Create a paper pencil pot
For kids
Create masks
For kids
Make a Valentine's Day Gift
For kids
Make a corrugated cardboard parrot
For kids
Create corrugated cardboard totems
For kids
Make expressive faces out of paper
For kids
Making a paper hot-air balloon
For kids
Make a 3D paper landscape
For kids
Create a paper mandala
For kids
Make a paper mâché globe
For kids
Create a garland for April Fools Day
For kids
Make 3D toys out of paper
For kids
Make a paper cactus
For kids
Make a silhouette card
For kids
Making corrugated cardboard arrows
For kids
Make a chronological frieze
For kids
Drawing a Horse
For kids
Making a secret egg box from card
For kids
Drawing a boat
For kids
Create a botanical book
For kids
Create a four seasons picture
For kids
Create a star mosaic
For kids
Making a snowflake
For kids
Create a beautiful glittering star
For kids
Create a shape memory game
For kids
Drawing a Happy Dolphin
For kids
Drawing a Playful Dolphin
For kids
Drawing a Knight on Horseback
For kids
Drawing a Griffin
For kids
Drawing children
For kids
Drawing a Penguin
For kids
Drawing a Horse and Cart
For kids
Draw a soldier
For kids
Drawing a Foal
For kids
Drawing a turtle
For kids
How to make ladybirds
For kids
Drawing a castle
For kids
Set off to discover modern history
For kids
Create a pop-up card
For kids
Activities for kids: Drawing a cat
For kids
Activities for kids: Graffiti
For kids
Activities for kids: Drawing a horse
For kids
Activities for kids: Drawing a hand
For kids
Playing with one's children
For kids
Your children's graphic development
For kids
Drawing a Dragon