
How to make ladybirds

Rate this tutorial
Average: 3.8 (4 votes)

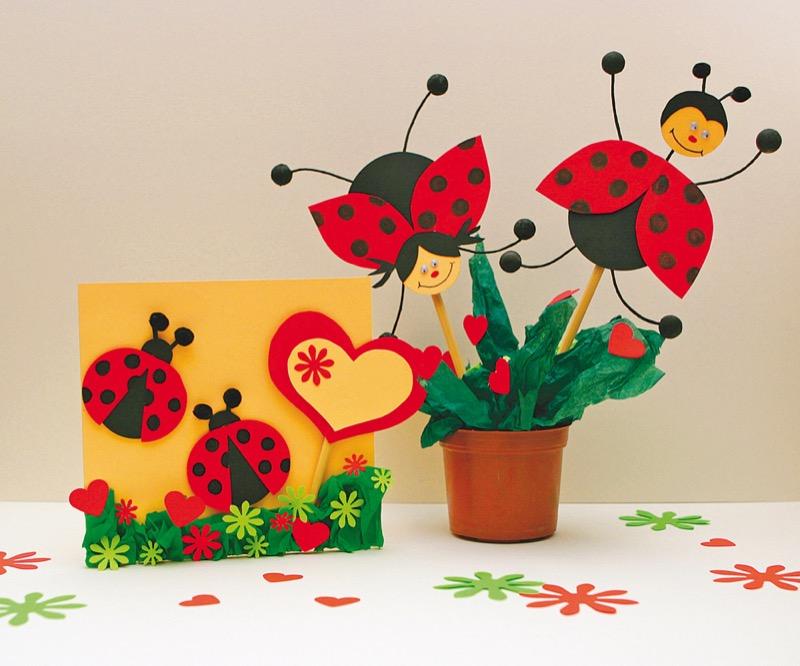
These ladybirds will bring children luck! They can be used as decorations or given with the card to friends and family.

Material:

  • Coloured Mi-Teintes® paper: red, black and cream (160 g/m²)
  • Canson® Silk Paper in different shades
  • Jewellery wire
  • Thin wooden stick (or chopsticks)
  • Small black pompoms (or wooden beads)
  • Small cotton balls (or wooden beads)
  • Flower punch
  • Adhesive googly eyes
  • Small pot
  • Black felt tip, glue, scissors, sellotape and double-sided tape

Step 1

Creating the "perched ladybirds"

Download the PDF for the template.

Cut two circles out of the black sheet, using the template's large circle. 

Use the template to prepare four red wings.

Using a thick black felt tip, draw spots on the wings, which you will then stick to the body.

Cut two circles out of the cream sheet to create the ladybirds' faces.

The remaining black sheet can be used to create the ladybirds' hairstyles.

Step 2

Stick the googly eyes to the face and draw on the mouth and nose, using the felt tip.

Step 3

To create the antenna, cut two lengths of wire and stick them to the back of the head, using sellotape.

For the ladybirds' legs, cut eight lengths of wire, 8cm long.

If you want to, you can cover the wire with black Silk Paper.

Stick 4 lengths of wire to the back of the body of each ladybird, as shown in the photo.

The sellotape will help to strengthen the wire and will stop it slipping.

Step 4

To finish off the legs, use the small black pompoms or wooden beads.

You can also create small balls using the black Silk Paper.

Stick them to the ends of the wire.

Step 5

To insert the ladybirds in the pot, stick the wooden sticks between the ladybirds' legs.

Step 6

To finish, cut up the green Silk Paper into different sizes; scrunch them up and put them in the pot.

The parts which come out of the pot need to be pointy, like blades of grass.

And there you go, a cute pot of ladybirds! 

Step 7

Creating the ladybird card

Firstly, cut a rectangle out of the cream sheet, measuring 36 x 16cm.

Fold it in half. Use the pieces of green Silk Paper, scrunch them up a little and stick them to the front of the card. 

Step 8

To create the flowers and hearts, use the templates, cut the shapes out of the green and red paper and stick them to the grass. 

Step 9

For the ladybird, cut out two red circles and two black circles. Cut the red circles in half.

Stick each red half circle to the black circle so that they overlap at the top and are spread out at the bottom. Colour in the black spots using the felt tip.

Step 10

Cut out from the black sheet to create the faces.

Stick them to the back of the body.

Cut out two thin black strips to create the antenna and stick them to the back of the head.

Stick on the pompoms or the balls of Silk Paper.

Step 11

Cut two large hearts out of the red sheet and cut a medium-sized heart out of the cream sheet.

Adjust the size of the wooden stick to the height of the card and stick it in the middle of one of the red hearts.

Step 12

Stick a little flower in the corner of the message.

Stick the remaining red heart on the other wooden stick so that the hearts line up.

Leave to dry, pressing down with your hand.

Write your message on the cream heart and stick it to one of the red hearts using double-sided tape.

Step 13

To finish, stick the heart on the letter and use double-sided tape to stick on the ladybirds.

And there you go: a pretty spring card which is sure to raise a smile!

Recommended product:
Mi-Teintes®