
Make a silhouette card

Rate this tutorial
No votes yet

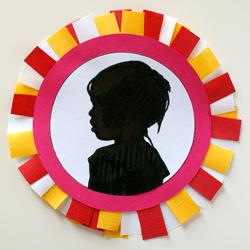
An all-paper card made with a portrait of the children! A simple creation that each child can personalise with their own silhouette, colours and message written on the back.

An original card to give and very simple to make!

Materials:

How were the first silhouettes made?

Drawing the profile of your entourage was very common in the 18th century.

A machine was even invented for this purpose; although in fact it was more of a method:
the model was placed near a screen and on the other side a candle projected their shadow, the artist could draw the outline of the shadow on the screen and get a faithful silhouette of the model.

Drawing the profile

Print the portrait of each child (about 6 x 9 cm), the photo should be taken in profile and on a light background so that the outline of the face stands out well.

Directly on the photo, trace the outline of the portrait with a black marker and colour the profile all in black.

Cutting the profile

Draw a circle of about ten centimetres around the profile and cut it out.

Creating the frame

In the coloured paper, cut a slightly larger circle than that of the profile, about 12 cm and paste the profile in the centre.

Cutting the kraft paper

To decorate the outline of the card cut small rectangles (about 1.5 x 3.5 cm) into the kraft paper, to save time cut several layers of paper at a time.

Finishing touches

Stick the kraft rectangles on the back of the circle.

To finish the card, cut a circle in the white paper (about 11 cm), and paste it on the back, which will cover the base of the fringes and allow you to write a message

Tip

Has this project inspired you? Let the adventure continue! Canson wants you to showcase your students' creations by sharing them with our community. We'd love to see what they've created, whatever it is! Simply contact us using the contact form.