
Create a paper mandala

Rate this tutorial
No votes yet

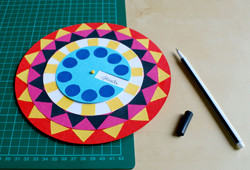
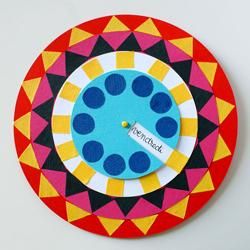
Create a paper mandala with the children, a very simple creation that requires just a few cuts!

This mandala is assembled with a brad that allows you to have a rotating circle in the centre and on which you can write messages, such as the days of the week for example!

Materials

Do you know the origin of mandalas?

- The mandala is a representation using a circle as the basis, it is used in several religions (Buddhism, Hinduism) and serves as a medium for meditation.
Its designs can be both figurative and abstract.

Today we find many for colouring as a way to relax and meditate!

Cutting the circles

Start by cutting circles of 4 different diameters (20, 16, 12 and 9 cm in diameter, for example).

The second smallest circle will be in white paper, because this is the one on which the text will be written.

Assembly

Glue the 3 largest circles together, with the white circle on top.

In the smallest circle cut a notch of about 1 cm in height, stop your cut about 6 mm from the centre of the circle.

Adding the last circle

Attach the last circle to the other 3 circles with a brad, do not over tighten as the top circle should be able to rotate easily.

Cutting the motifs

To reduce the number of cuts, you can fold a strip of kraft paper on itself and quickly get identical motifs.

Cut out simple geometric shapes: triangles, squares, circles, etc...

Collage of the motifs

Paste the patterns on your discs one by one, making sure they contrast with the background colour.

Writing the text

Write the information you want to add in the notch of the upper circle. It could be the days of the week, but the mandala can also be used for something else, a message for a gift card perhaps.

The only constraint is of course the space available on the white circle.