
Drawing: Creating rubbing effects

Rate this tutorial
Average: 2.6 (5 votes)

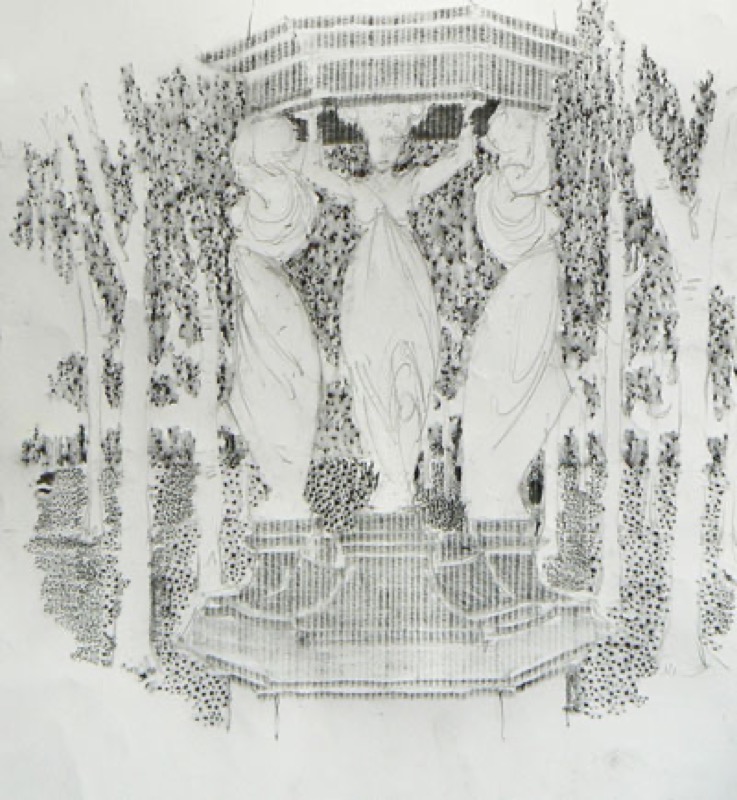
A kitchen grater, the sole of a shoe, a doily… Those everyday objects don't look all that important. But they can add a touch of originality to your drawings! Give your creativity a boost with the rubbing technique, it's as easy as child's play. 

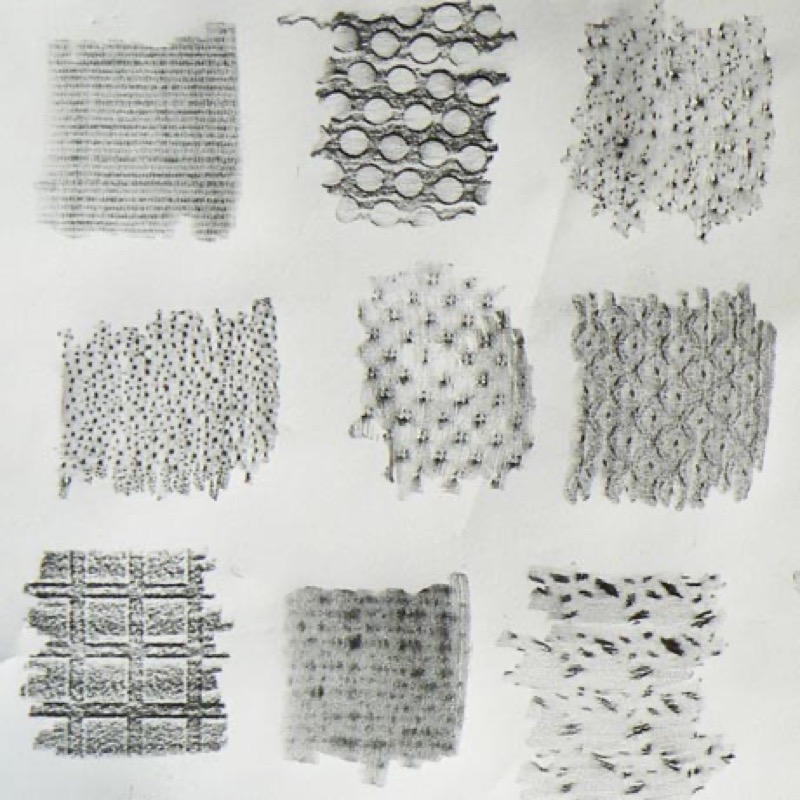
Generally, in a drawing, it's the finer or rougher grain of the paper that produces material effects. To take things further, create a broad palette of textures by rubbing your pencil lead over a sheet of paper placed on top of various materials.

1. Selecting a material

Your immediate surroundings offer a multitude of possibilities: any material can be used. Vary the effects by modifying the pencil pressure on the sheet of paper. Here are a some suggestions for rubbing materials:

-a wall with a granular surface, to represent an expanse of sand

-a doily, for true to life lace

-a piece of raw wood, to suggest the raised pattern on a tree trunk

-a kitchen grater, for honeycomb patterns

… etc. ! A piece of advice: give your imagination free rein!

That little extra

Continue putting together a collection of rubbing effects by saving samples created on scratch paper, and don't forget to keep a list of the materials used.

2. Réaliser des frottages

Le matériel :

- Choisissez un papier pas trop épais : par exemple un papier à dessin (de 60 à 120g/m2), ou du papier calque, comme le papier.

- Un crayon HB.

Placez votre feuille de papier sur une surface rugueuse de votre choix.

Frottez la zone du dessin concernée avec votre crayon.

Recourez à cette technique avec modération : multiplier les effets de frottages surcharge votre composition. Associez plutôt frottages et dessins à main levée !

Si vous utilisez la technique du frottage pour représenter l’objet frotté (un napperon sur une table), assurez-vous qu’il soit à l’échelle.