Do you know how to draw a circle and some lines? Then you know how to draw a face! Putting a few points of reference in place first will greatly simplify your task. Concentrate a little, review some geometry and you're all set!
Do you know how to draw a circle and some lines? Then you know how to draw a face! Putting a few points of reference in place first will greatly simplify your task. Concentrate a little, review some geometry and you're all set!
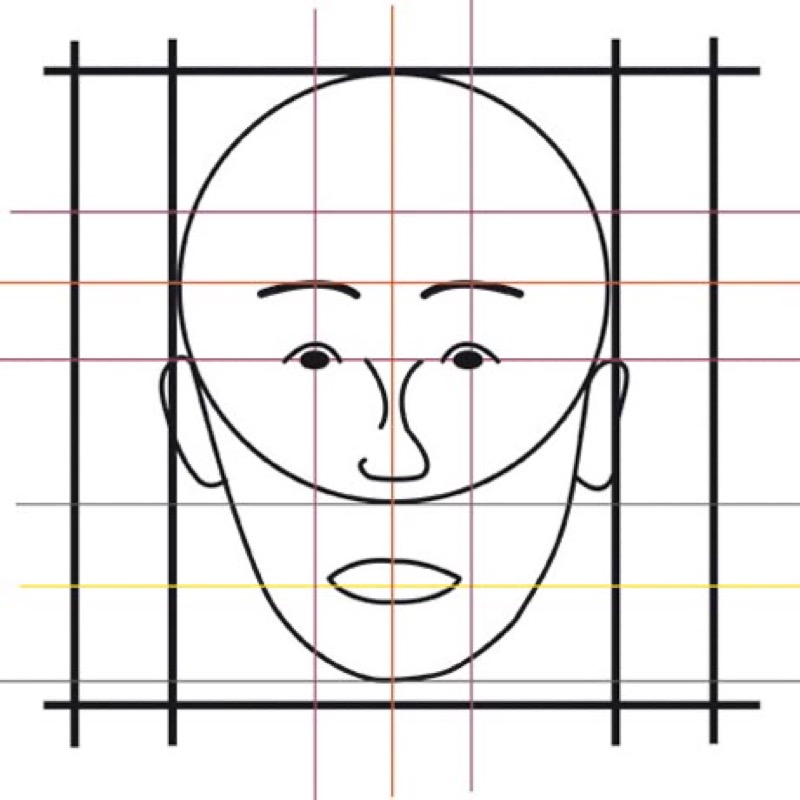
Step 1: draw a freehand circle.
Step 2: draw the vertical and horizontal diameters (red lines).
Step 3: now draw two horizontal lines, cutting the circle into three parts (purple lines). Do the same thing with two vertical lines.
Step 4: extend the circle downward by drawing an oval below it. do so by drawing a U, like the illustration.
Step 5: draw a new horizontal line halfway between the bottom of the circle and the bottom of the U (yellow lines).
Step 6: everything is ready for adding the main facial features:
The length of your hand is equal to the length of your face from your chin to the roots of your hair. Check it out!
By subscribing you will receive the Canson newsletter 6 times a year. This newsletter will contain information about products both new and old, we offer tutorials and we will also tell you our news (promotions, events, social media etc.). Please enter your contact information to complete your subscription.