
The forest is a rich graphic universe and a good source of inspiration for making a paper cut-out artwork. The multitude branches, lianas and foliage makes it possible to create dense interweaving lines from one side of the page to the other. Attention to detail and patience are the other ingredients necessary to obtain a great end result.
Material
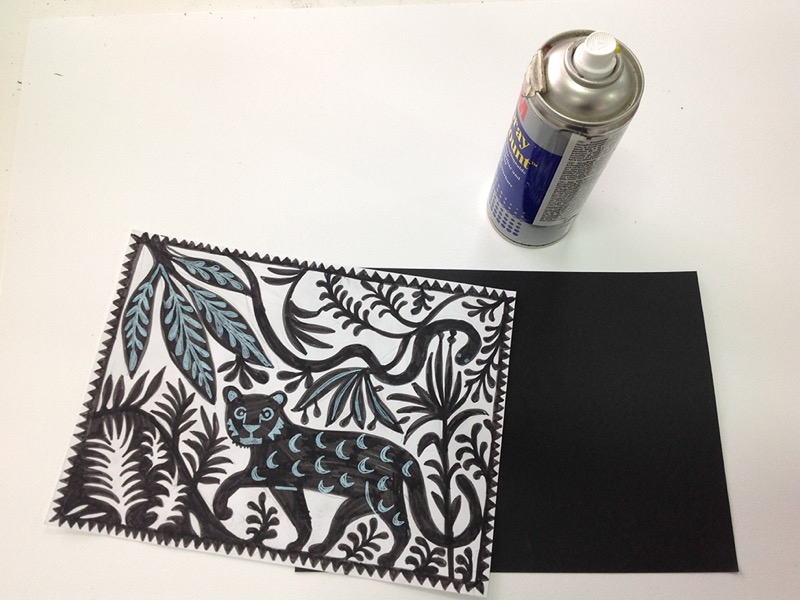
- Paper : Canson Colorline, black, 220 gsm, A4 format Canson Colorline white, 300 gsm, A4 format Canson Colorline, in the colour of your choice, 300 gsm, A4 format A sheet of ordinary white paper, A4 format.
- Pencil, felt-tip pen, marker: a 2B pencil, a black felt-tip pen, a fine-tip Posca white marker.
- Accessories: X-acto (precision knife), spare blades, repositionable spray glue, white glue, a cutting board.
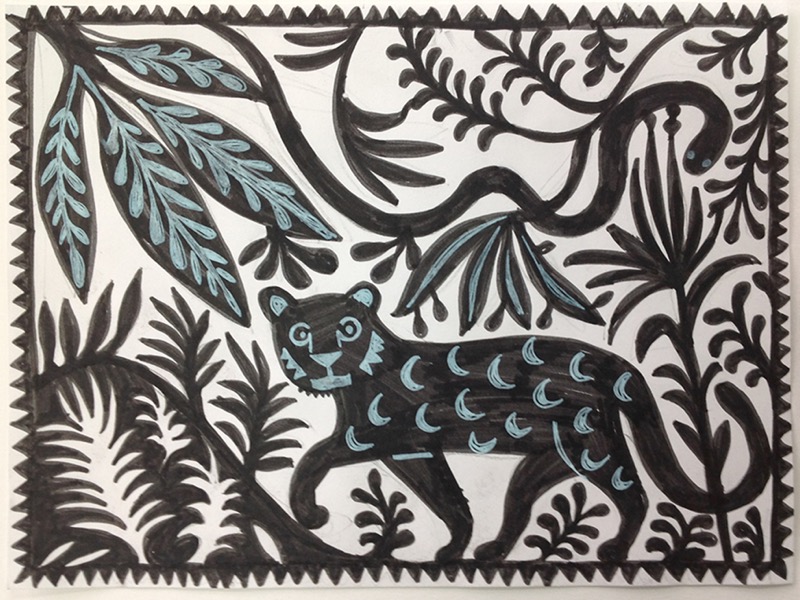
Step 1 : Choosing a pattern
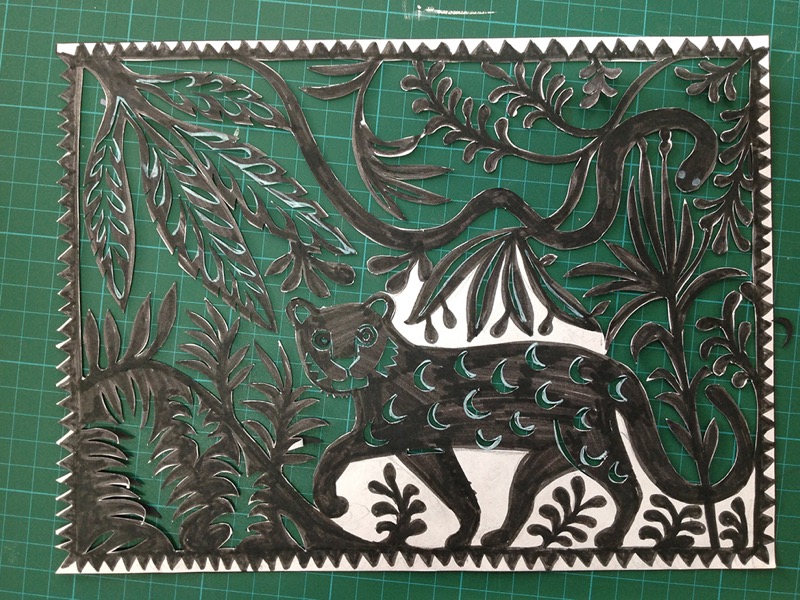
To make a cut-out artwork, create your own subject, draw it with a pencil on a sheet of white paper and finalise it with a black felt-tip pen as in the model below. If you wish, you can use this model by printing it in A4 format, or you can look for a similar image, an image depicting black silhouettes on a white background. It is important to clearly delineate the black areas from the white areas and to ensure they are always fixed to the edge of the drawing, or to another element fixed to the edge, as all the white parts will disappear.
Tip: If you create your pattern yourself, you can use a Posca white marker to add certain details in your black areas.
Step 2: Gluing the pattern
Using the repositionable spray glue, glue your pattern to the black paper. Spray the glue gently and glue the two sheets together, edge to edge.
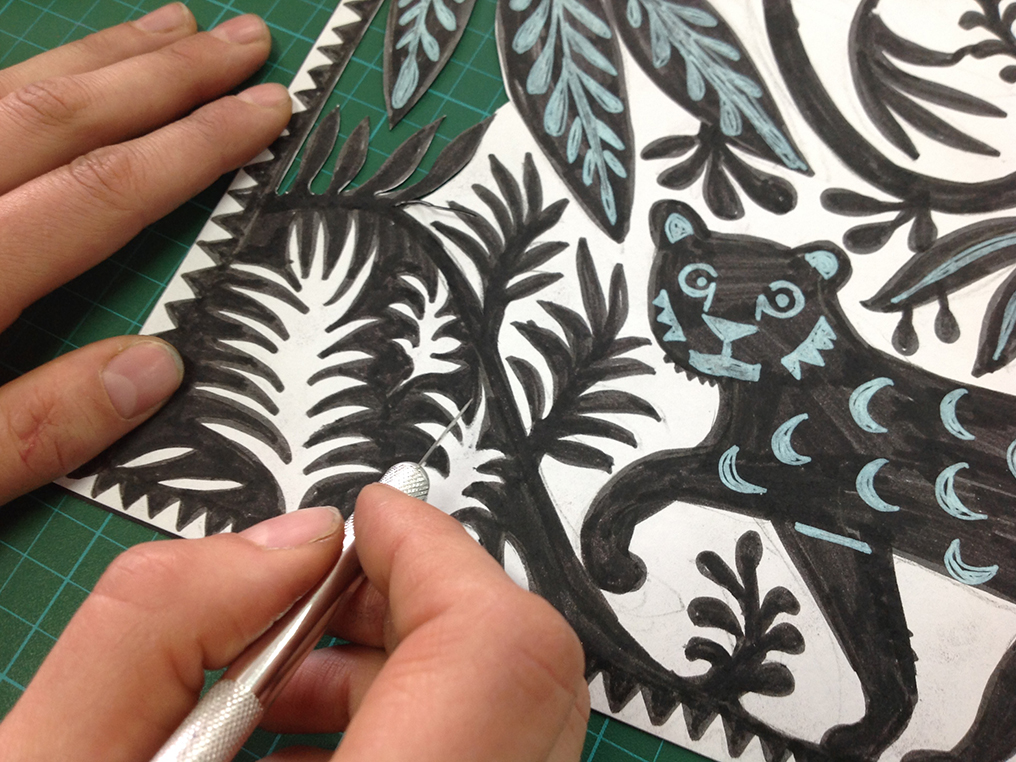
Step 3: Cutting out your subject
Using the X-acto and leaning on the cutting board, carefully cut out the white parts of your pattern. Press down firmly on the board to ensure you cut through both sheets of paper.
Step 4: Eliminating all white surfaces
Little by little eliminate all the white areas from your pattern. Certain small parts will be harder to cut out, take your time and frequently change the blade of your precision knife to ensure clear, decisive cuts.
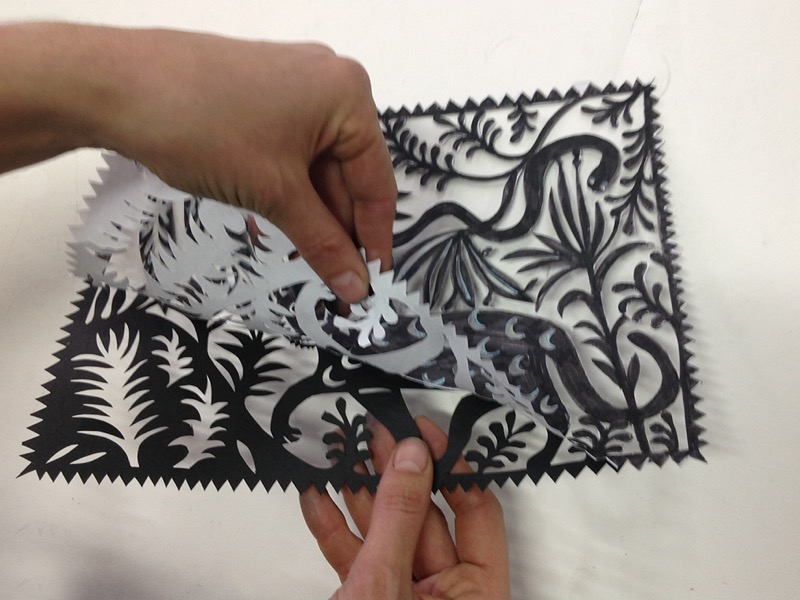
Step 5: Peeling off the pattern
This step requires great care. Remove the pattern from the black paper. If pieces of the pattern remain glued to the black paper, don't worry, you can conceal these during the next step by turning your cut-out over.
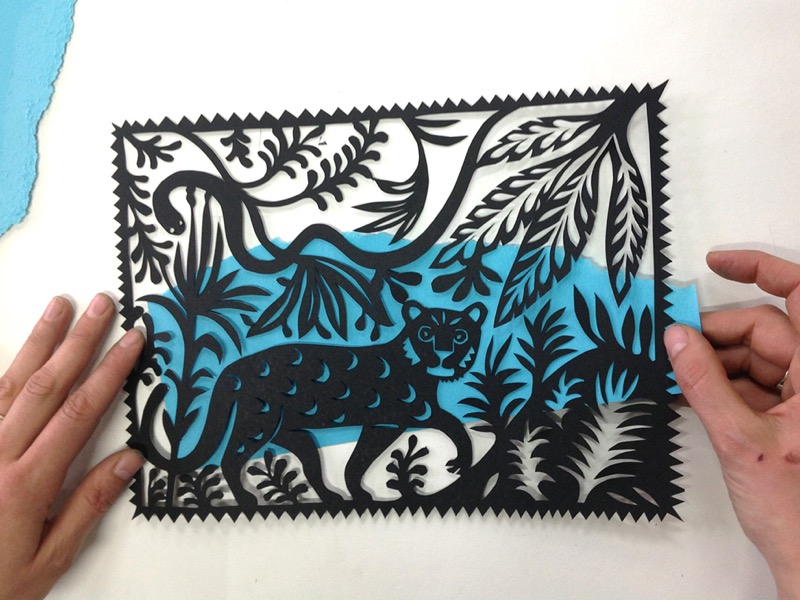
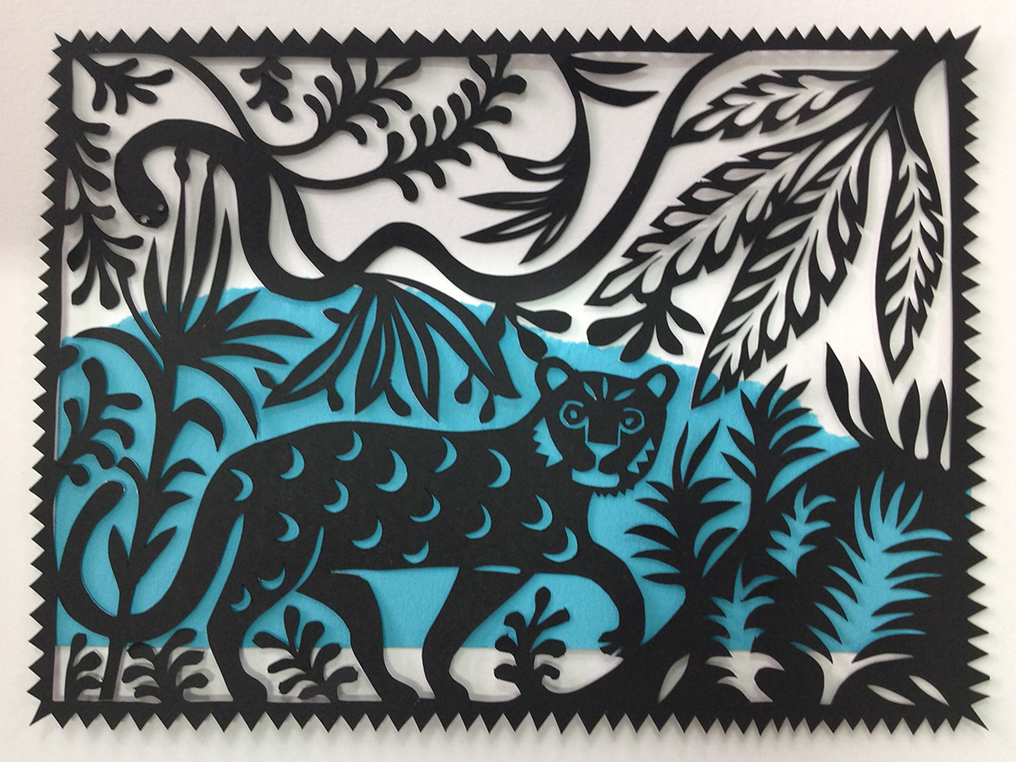
Step 6: Making the background
To make your background, glue one or several strips of torn paper to your sheet of white paper, then position your cut-out paper on top of this. When you are happy with the result, fix it meticulously with several dots of glue.
Tip: to enhance your cut-out image, place several dots of glue under your cut-out paper to create thickness so that the light can pass between the two surfaces of paper and create shadow effects.
Recommended product:
Colorline®