Make watercolors easier for yourself so you can paint worry-free! Before getting started, make sure to prepare your material and work plan. Because a little organization = a lot of progress!
1. Paper
First step: the watercolor paper should be stretched to keep it from buckling while drying.
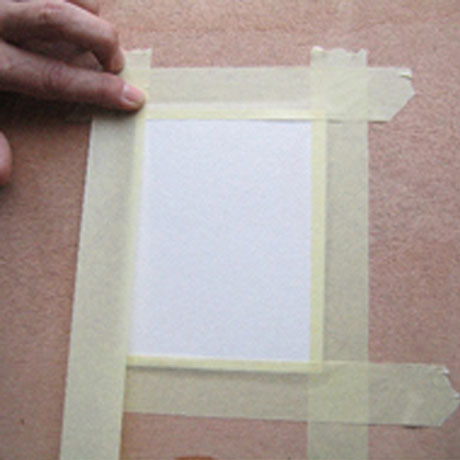
a. On a wood board, cardboard or plywood.
Use a backing that is slightly larger than your sheet of paper.
- Moisten both sides of your paper with a sponge, then place it on the backing.
- Wet both sides of the sheet of paper, then apply four strips of gummed paper (or Kraft paper) to fasten it to the backing.
- Wipe the strips with a sponge, pressing down firmly.
Remember: you can use adhesive tape instead of gummed paper!
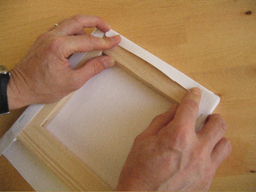
b. On a frame
After moistening your paper, attach it to the frame, folding each of the corners around its wood strips.
Staple the paper to the back of the frame, making sure to fold very clean corners.
Remember: You can also use thumbtacks to attach the paper to the frame.
c. Pad glued on four sides
To keep from having to stretch paper, use a pad of watercolor paper glued on four sides. The sheets, because they are stuck to one other, stay perfectly stretched. Once your paint is dry, all you have to do is gently remove the sheet of paper from the pad!
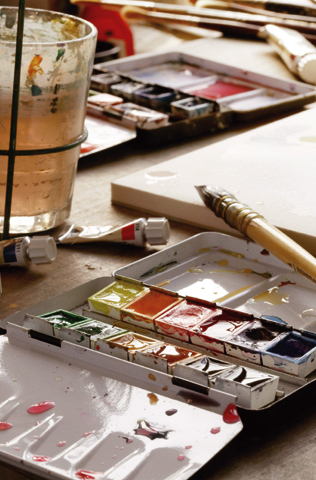
2. Colors
Given the range of colors available to you, you can be methodical: there's no point in cluttering your work space!
- Start by observing your model and determining the main colors you are going to need.
- Organize them on the palette: because each of us has our own habits, this is a very personal step. If you are just getting started, you can arrange your colors from warmest (red, yellow) to coolest (blue). And don't forget to have twice as much of the ones you are going to use the most. A second palette may be called for to keep from creating undesirable color combinations.
- Remember to have extras to use as scratch paper of the same paper as the one you're using : they are useful for gauging color dilution levels, testing color mixes, and creating a color chart.( Note: "…creating a color chart," create link to Watercolor: Colors and water dilution)
3. Water
Water, the basic ingredient for watercolor painting, should not be either too hard or too acid, to keep from affecting color retention. Your best option is demineralized water.
- Any container makes a good water recipient, so long as it is big enough. A bowl, an old jam jar, or even a plastic water bottle with the top cut off!
- You can also use two containers: one for cleaning your brushes and another with clear water for thinning colors.
- Set up your work space near a source of water so you can replenish your water faster.
Memo: Visualize…
You need to visualize your painting before getting started: this way, you can plan what you'll need in terms of materials (drawing gum, toothbrush, sponge, utility knife, etc.) Write a list as you think of things, then put your tools where you can reach them from your work space. This list is all the more necessary if you're going to be painting outdoors!
Recommended product:
XL® Watercolour
See also :
Watercolour
Selecting your watercolor paper