
Painting an abstract watercolour – Wet on wet technique

Rate this tutorial
Average: 5 (6 votes)

Estimated time: 2 hours   
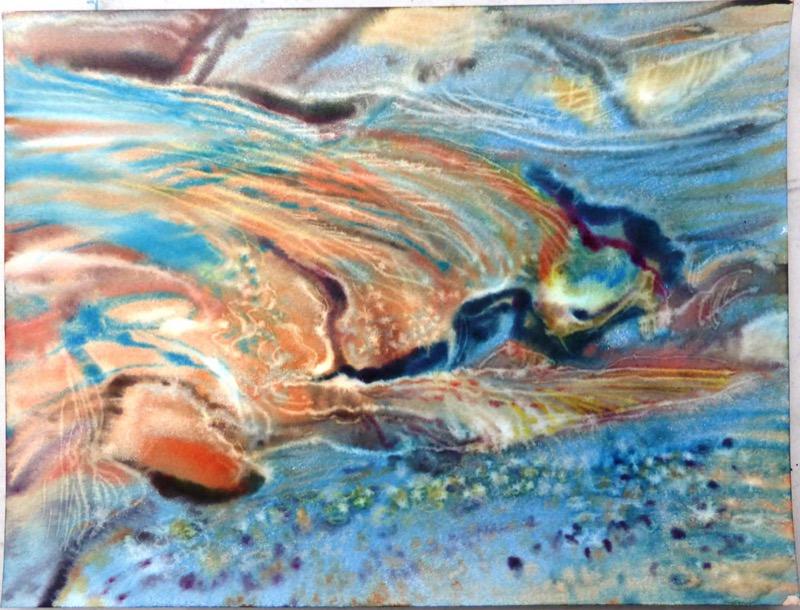
Level: expert

Artist: Ewa Karpinska, www.ewa-karpinska.fr

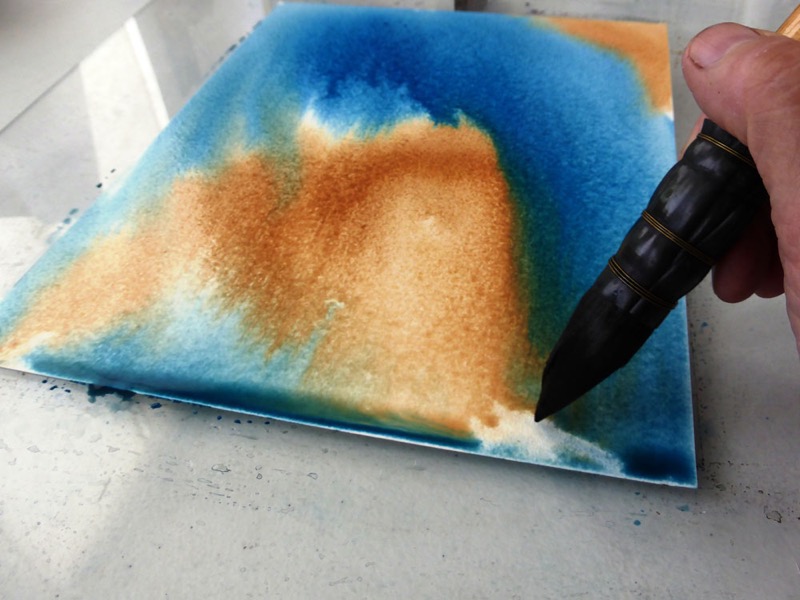
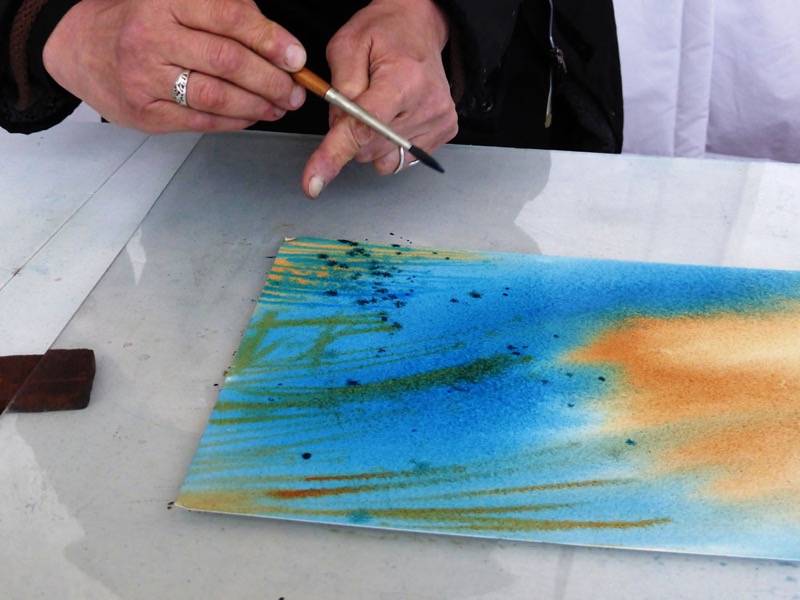
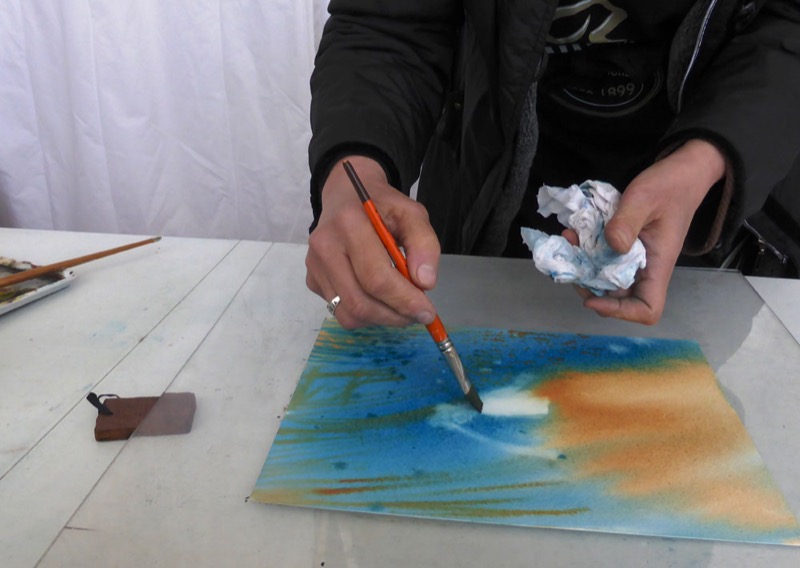
Set yourself a challenge, try out the wet-on-wet technique for watercolour painting!

With this landscape, you will learn how to work in harmony with the water cycle; you will experience the pleasure of allowing the water and the colours guide you, yet retain a certain level of control in order to create your chosen subject. 

Material :

  • Paper : Canson® Moulin du Roy, fine grain, 300 gsm
  • Watercolour paint: blue, yellow, green, pink, red
  • Brushes: sable hair, liner, acrylic brush
  • Accessories: a porcelain palette or large plate, a sheet of Plexiglas 

Step 1 : Preparing the paper

Submerge the paper for 1 or 2 minutes in a tray filled with water, allowing it to absorb the water. This will prevent the paint from seeping into the core of the paper too quickly and will give you more time to handle it.

Place the wet paper on the Plexiglas sheet, it will remain flat as long as the paper is sufficiently wet.

This is the easiest method to ensure flat paper. Be careful not to trap air bubbles between the paper and the sheet of Plexiglas.

Step 2 : Applying the first colours

Load your brush with diluted colour and apply the first pools of colour by pressing the hairs of the brush between your fingers.

Tilt the Plexiglas to direct the coloured liquid run in and repeat this process with a second colour.

The more you tilt the Plexiglas the more the colours will mix together.

Step 3 : Stabilising the pools of colour

When you are satisfied with the mix of the first pools of colour, stabilise the tilt by placing a 1 to 2 cm wedge under one end of the Plexiglas.

The paint from the highest section will “trickle down” first and you can use it

for details, while the excess coloured water will accumulate at the opposite edge. You can remove this excess with a large damp liner from which you have removed all excess water.

Step 4 : First graphics

Load (average quantity) one of your fine brushes with a cream paint (orange) and paint lines on the blue surface.

Only do this on the dryest part of the paper, even if your image extends lower! Sprinkle the lower part of your work with blue droplets to add texture to the surface.

Step 5 : Creating white spaces

Load the acrylic brush with water and rub it very lightly over the space you wish to lighten. Dry the brush immediately and soak up any excess liquid. 

Add a small quantity of water to restore equal thickness to the film of water.

If dried too much, the surrounding wash could run and cover up the white space created. On the contrary, if too much water is added, a stain will form.

Step 6 : Applying masses of colour

Take some thicker paint; when it is diluted in the water available on the paper, it will retain its full value and will not run too much.

With this density of colour, paint surfaces where there is sufficient water for dilution, or fine graphics where the paper is sufficiently dry.

Step 7 : Extending white spaces

When the first graphics are sufficiently dry, you can continue to create more white spaces. To create white lines, use a brush dipped in clean water.

Hold the brush perpendicular to the sheet and skim the surface of the paper.

The load on the brush must be proportionate to the desired effects.

Step 8 : Coloured lines

To create coloured lines, dip your brush in colour.

When you are satisfied with the result and when no drops of water remain visible on the surface of the paper, dry your watercolour with a hair-dryer to prevent any movement of paint.

Allow the watercolour to dry for several hours longer for it to acquire its full luminosity