Acrylic paints are not messy and clean up easily with soap and water. But, like any other technique, you need to take good care of your materials so they last a long time!
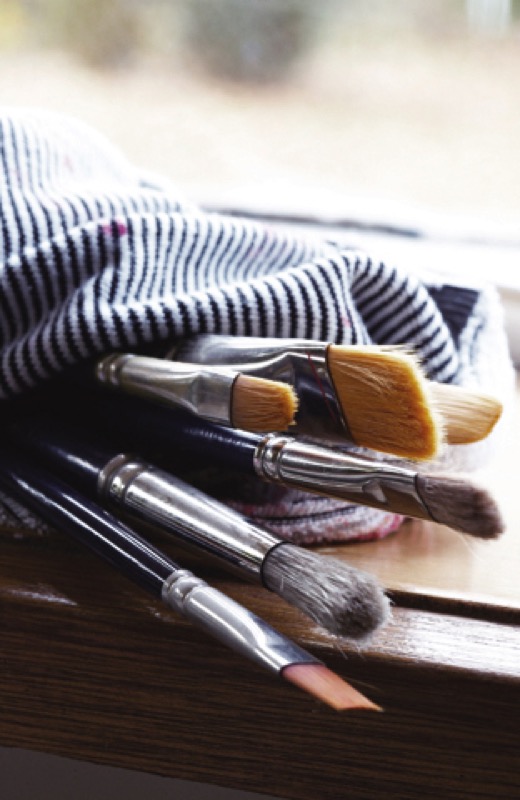
1. Paintbrushes
Because acrylic paints dry fast, you need to make sure your paintbrushes stay wet while… otherwise the paint will cake up the brush, especially around the ferrule, stick the bristles together, and make cleaning up much harder! The best approach is to store those paintbrushes you use the least lying down in a shallow container (a tray or a pie pan).
If you don't use them for a long time, store them lying down in a box or drawer, away from dust, with a few added mothballs!
5 steps to a clean paintbrush:
- Start by rinsing the bristles of your paintbrush in a container of clean water.
- Next, remove the extra water from the brush bristles, snapping your wrist to shake it hard.
- If you still notice caked paint in the bristles or around the ferrule, gently soap the bristles in the palm of your hand and rinse thoroughly under hot water.
- Gently smooth the bristles between your thumb and index finger to get all the bristles back in place.
- Dry your paintbrush lying flat, on absorbent paper or a hand towel. Once dry, store in a paintbrush container with the bristle end up.
Don't forget: don't dry your paintbrushes upright, because water will seep into the ferrule. As a result, the moisture will swell the wood handle and spread the bristles. Your paintbrush will lose its shape and your stroke its fineness!
Getting it right
Do you have dried, caked paint? Try one of these two methods!
- Let your paintbrush soak in hot water: it will soften the paint so you can pull it carefully with your fingers.
- Use a white, spirit type of solvent, then rinse thoroughly.
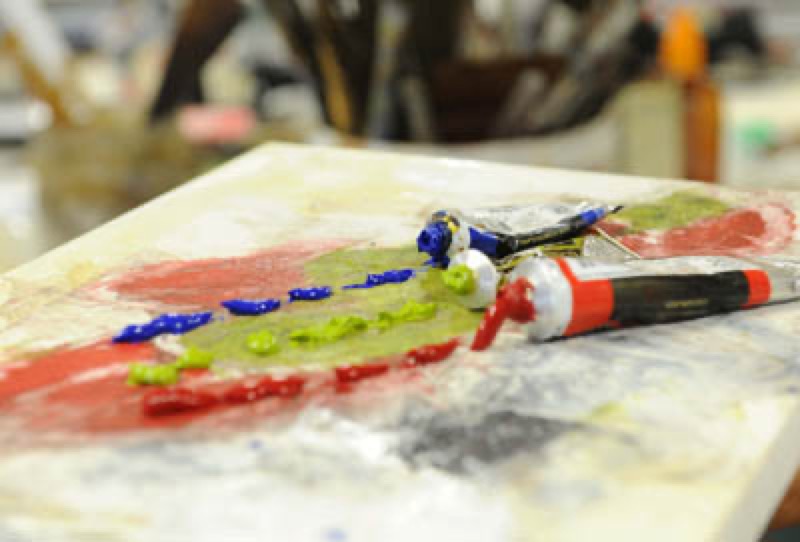
2. Colors
Acrylic paints are water-based and harden when the water evaporates, drying them quickly, so it is essential to thoroughly screw caps onto tubes and bottles after each use.
- Wipe the threads with a rag before screwing the cap on the tube, to keep it from sticking. If the cap gets stuck anyhow, the simplest solution is to put the tube in hot water until you can unscrew without forcing it.
- Roll up the empty part of tube to put all the paint at the neck end of the tube. Why? This will allow you to gauge how much paint you have left at a glance!
Keep in mind: to be ready for your next session, you can keep your paint on your palette wet by covering it with plastic wrap.
3. Palette
Clean your palette as soon as you finish your painting session! The less time the paint has to dry, the easier it will be to clean it up. Start by removing the extra paint with a palette knife, then rinse under hot water and rub any stuck paint with a sponge and a little soap.
Handy advice
- Porcelain and earthenware palettes are easy to clean: just let them soak in hot water, then rinse with running water.
- Plastic palettes get dirty easily if they are not thoroughly cleaned after each use: clean meticulously with soap and a sponge. Scrub corners with a soapy tooth brush.
4. Painting and palette knives
- Soak them in a tub of hot water until the paint softens.
- Scrape the paint with the blade of a knife or a razor.
- Scrub with a soapy sponge to remove any remaining residue.
Recommended product:
Graduate Oil and Acrylic