
Oil: Still life, coffee mug

Rate this tutorial
Average: 3.7 (3 votes)

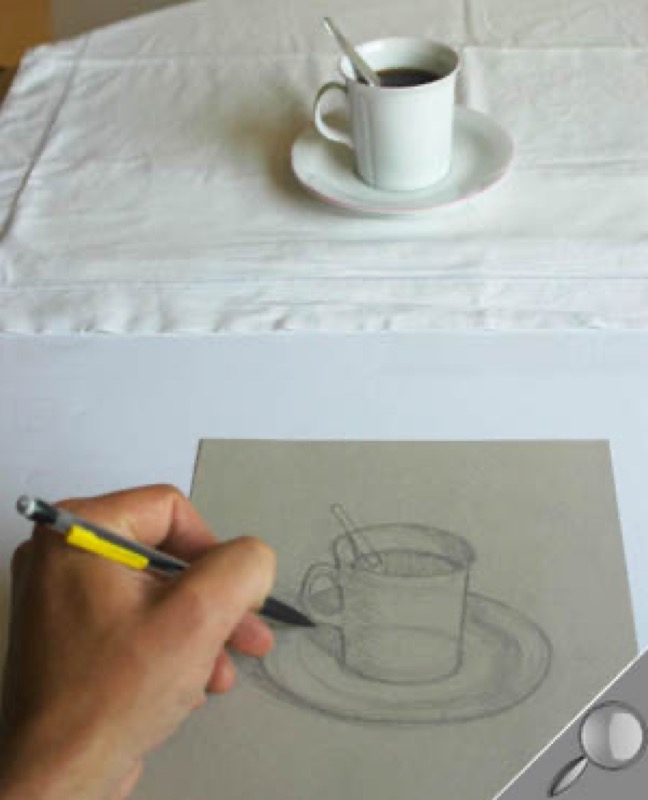
Level: beginner / Time of execution: 2 hours + Drying time: 1 week

Artist : Olivier Desvaux 

This exercise will start you off on the right foot with oils! It includes three basic concepts you need to get going:

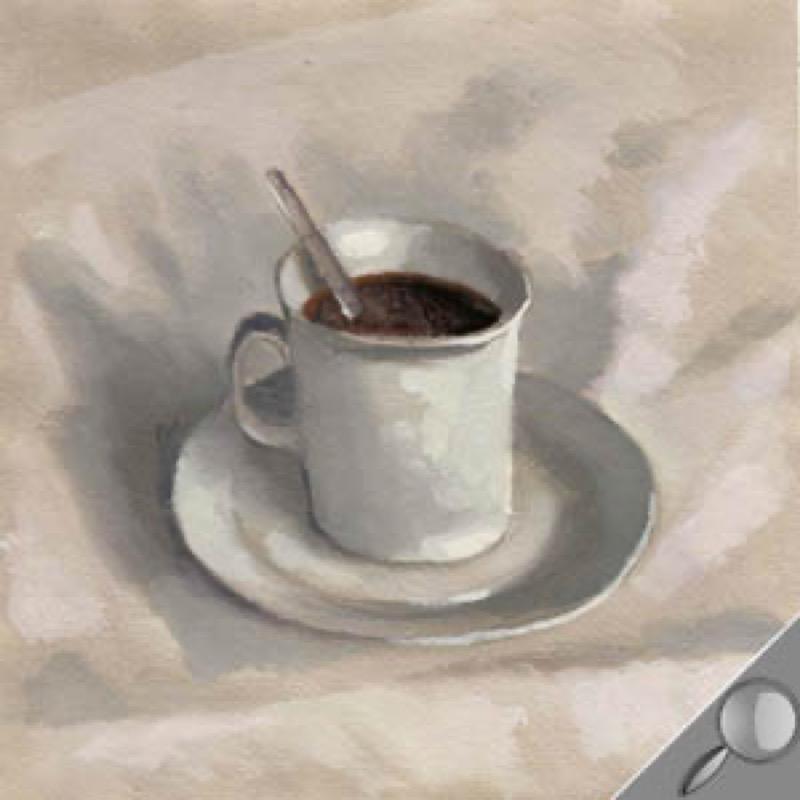
  • mixing colors, with the goal of creating your own palettes;
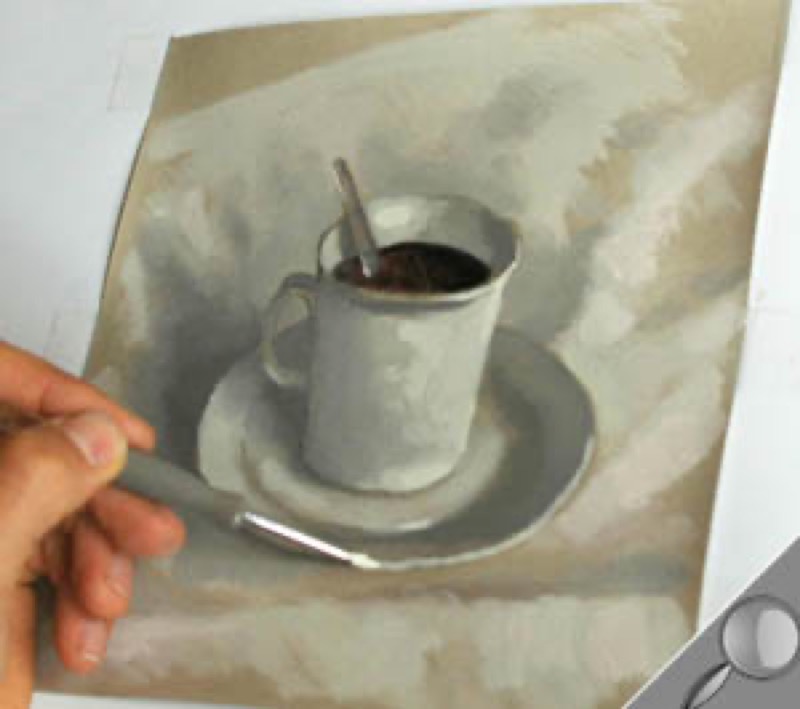
  • value scales, to learn how to create several variations of a color;
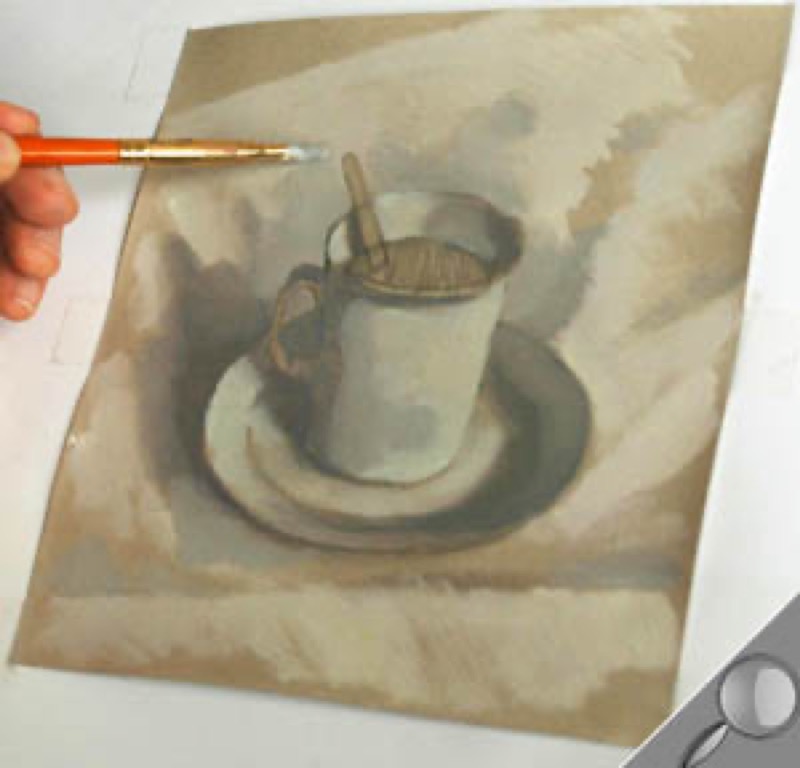
  • the interplay of shadow and light, to add style to your future works.

Material

Paper: Canson® Mi-Teintes® 160g/(m)2, lime color.
Colors: Daler Rowney Graduate oil paints in tubes

titanium white, lamp black, ultramarine, yellow ocher, dark cadmium red, light azo yellow.

Pencils and paintbrushes: 1 HB pencil or mechanical pencil, 1 blender brush, 1 fine filbert brush, 1 medium round brush and 1 fine round brush.

Accessories: 1 wood palette, turpentine (and 1 jar to hold it while working), wood glue (and 1/2 a plastic bottle for mixing), water, 1 roll of cellophane tape, 1 rag.

Step 1

Sketching the subject.

Start by attaching your sheet of paper to your worktable with cellophane tape (3 strips per side).

Use the pencil to draw the contours of the cup and saucer without stopping: your gesture should be light, sweeping and quick. Finish with the teaspoon.

Step 2

Refining the drawing: add values..

Quickly hatch the shaded areas: the ones you observe in real time on the subject. This will allow you to pave the way for adding color: work on the saucer, including the shadow it casts on the tablecloth, cup, and coffee.

Step 3

Coat the paper with glue.

Prepare a batch of glue in the plastic bottle (a small amount): 1 measure water to 1 measure wood glue; mix well until you have a homogeneous liquid (you need to apply your colors to a smooth surface). Go over the whole sheet of paper with the blender brush.

Step 4

Paint the shadows with neutral gray.

Place one dose each of white, black, blue, red ocher around the edges of your palette. In the middle of the palette: mix equal amounts of black and white, and add a dash of red and blue. Add a little more ocher. Mix well: your gray should be perfectly homogeneous.

Load the filbert brush, dip quickly in turpentine and apply to the hatched areas: cup, saucer, tablecloth.

Clean your paintbrush: dip it in the turpentine, shake and wipe it on the rag. Repeat until it is thoroughly clean.

Step 5

Use the filbert brush to whiten the areas of light.

Add some yellow to the palette, then create a new mixture: equal amounts of white and blue, a dash of red and yellow and a little more ocher. Dilute in turpentine.

Paint the cup, except the handle and the dark areas. Paint the saucer, leaving several small areas untouched; trace around the shaded areas, too. Work on the tablecloth.
This layer should be irregular, with the color of the paper showing.
Clean your paintbrush.

Step 6

Creating transitions from shadow to light.

Go back to your previous blends (neutral gray and white) and mix them separately: this will yield an intermediate light gray. Dilute in turpentine. Apply lightly in between shadows and areas of light to create a gradation: saucer, cup, tablecloth.


Clean your paintbrush.

Step 7

Doing the details with the medium round brush.

- The coffee: prepare a mixture of black (dominant) with a dash of red and ocher. Dilute, then with apply with the paintbrush. Apply strokes in varying thicknesses: this allows you to obtain variations in color (ranging in transparency) and material (ranging in lightness). Clean the paintbrush.

- The spoon: go back to your neutral gray mixture (step 4), dilute and apply. Clean the paintbrush.

- Handle and right side of cup: use the gray from step 6, dilute and apply.

Clean your paintbrush.

Step 8

Use the medium round brush to reinforce the light.

Take your neutral white from step 5, and add a dash of white. Apply the paint straight, without diluting it with turpentine: reproduce the areas of light as you perceive it, depending on whether it is coming from the right or the left.


Clean your paintbrush.

Step 9

Add the finishing touches with the fine round brush.

Use the neutral white from step 8, slightly diluted, to highlight areas with strong light: the edges of the saucer, cup, and spoon handle. You can add a few dabs to the bottom of the saucer, to liven up the whole.


Allow to dry 1 week, lying flat, in a dry place.

Recommended product:
Figueras®