Adept at decorating, you want your creations to be 100% original? Personalize your mats by covering them in patterned or colored paper.
What you need to know
To use a solid color: glue the covering sheet directly to the mat.
To use the pattern of the paper to the best advantage: cover in strips, instead, varying the direction of the design.

Simple covering
Place the mat on the reverse side of the covering paper, mark the interior and exterior corners with a pencil.
Cut the sheet to the outside dimenisons of the mat.
Cut the mat opening with a utility knife, allowing 2 cm to turn in.
Glue the right side of the mat. Glue the decorated paper to the mat. Smooth and put under a press for 15 minutes.
Cut the corners of the turn-in edges at 45°, fold them under the mat using a bone folder.
Trace the outline of the mat.
Glue these areas, turn in, smooth and put under a press.

Covering in strips
Cut four strips of the covering varying the direction of the pattern: two in one direction, and the two opposing ones by turning the paper at 90°.Length = that of the mat
Width = that of the mat + 2 cm
Coupez à 45° les extrémités de chaque bande.
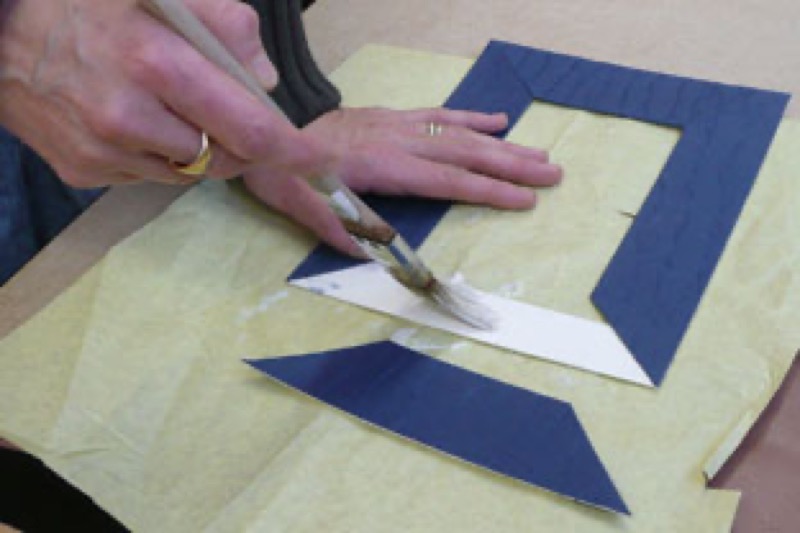
Coat the front of the mat with white glue.
Position the first strip on the left side, then the second on the right side.
Repeat on the other sides.
Smooth, turn in, put under a press.
That little extra
You can use other materials: fabric (respect the direction of the grain when cutting), delicate papers (Japanese paper, tissue paper...) etc.
Recommended product:
Iris® Vivaldi®
See also :
Framing
Framing: Attach the hanging ring