
Soft varnish etching with inlaying

Rate this tutorial
Average: 4.7 (3 votes)

Estimated time: 2 hours

Level: Intermediary

Artist: Charlotte Reine

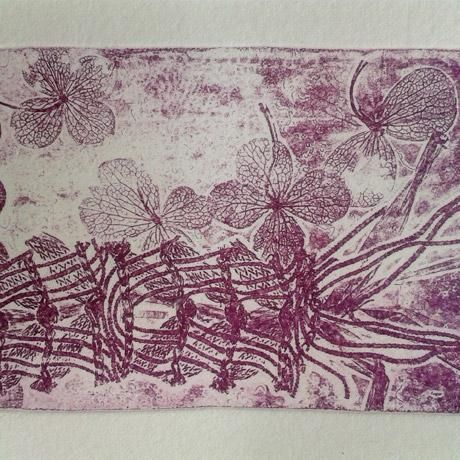
Soft varnish is a technique that is particularly useful when you want to create tiny details with plants, fabrics, feathers or various other materials.

It is also perfect for beginners who are not yet daring enough to engrave directly onto the plate!

Material :

  • Paper :  Canson® Moulin du Roy 300gsm
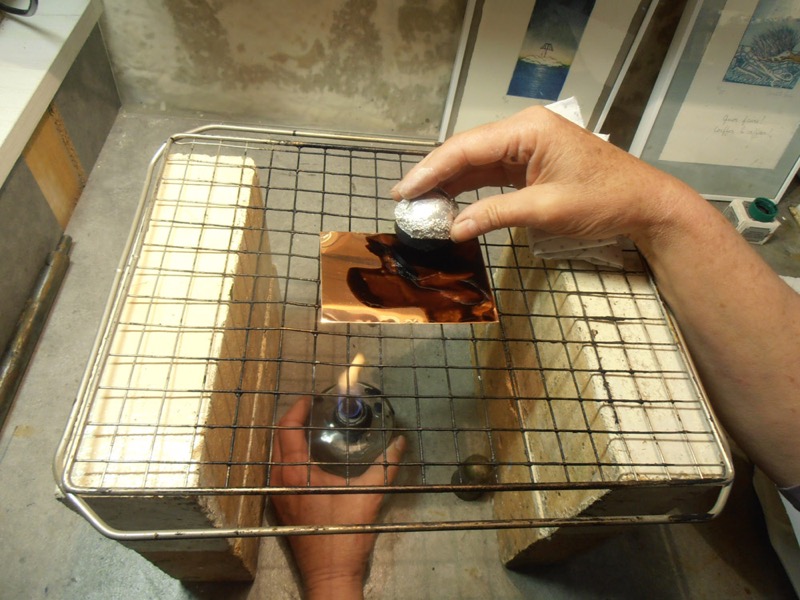
  • Accessories: soft varnish, a plastic tray, nitric acid diluted with 50% water, an 8 cm x 5 cm copper plate, a tube of sepia intaglio printing ink, white spirit, a spirit lamp, a grid, a sheet of rhodoid, an intaglio printing press and various plants and textiles.

Applying the varnish

Clean your plate with blanc de Meudon followed by methylated spirit.

Place your clean plate on a grid and heat it using the spirit lamp. This source of heat will make the soft varnish melt.

Rub the soft ball ground over the plate and spread the varnish well over the entire surface. Dab with a small crumpled cotton cloth to create a thin, even layer.

Preparing the elements for inlaying

When the plate has cooled place it on a folded sheet of newspaper.

When the plate has cooled place it on a folded sheet of newspaper.
Prepare the materials to be inlaid: any plants must be fully dry. Avoid using thick textiles. Place your composition on the plate.
You may find it useful to tape the elements to the newspaper outside your composition. You can also cut the elements protruding from the plate so they don't bother you when you put your plate under the press.

Putting under the press

Remove the felts from the press; these are large sheets of felt that are placed between the engraved plate and the roll of the press.

It is preferable to use just one used felt. Place the plate and the composition on the plate of the press.
Cover with a sheet of rhodoid, pull down the felt and put through the press exerting very light pressure.

Preparing the plate

Gently peel back the inlay from the varnish using a dry point if necessary.

Protect the back of the plate with packaging tape and allow some extra tape to protrude to make a tab which you can then use to handle your plate when submerging it in the acid bath.

The acid bath

This is the trickiest part of the process. Immersion time should not exceed 10 minutes initially. Soft varnish is a fragile varnish. Take the plate out of the acid frequently to check biting. Rinse your plate well with water every time.

Tip:To avoid a stippling effect during printing, use a feather to remove any bubbles that form on the plate.

Inking and wiping

Rinse the plate well with water. Don't hesitate to make a test with your fingernail on a small area of the varnish to ensure biting is sufficient.

Begin inking with special engraving ink and a dabber made from tarlatan, with which you will apply the ink on the plate in circular movements. Wipe the plate with another piece of clean tarlatan and then with tissue paper.

Careful wiping makes it possible to enhance the finesse of this technique.

Printing

Place your inked plate on the frame you drew previously (see Tricks of the trade: :how ink wipe and produce good prints?), pull down the felts and pass your plate through the press. Your print is ready!