
Pastel & Colour: Portrait of a young girl

Rate this tutorial
Average: 4.2 (6 votes)

Level: experienced /  Time of execution: 3 hours

Artist : Patrice Baffou 

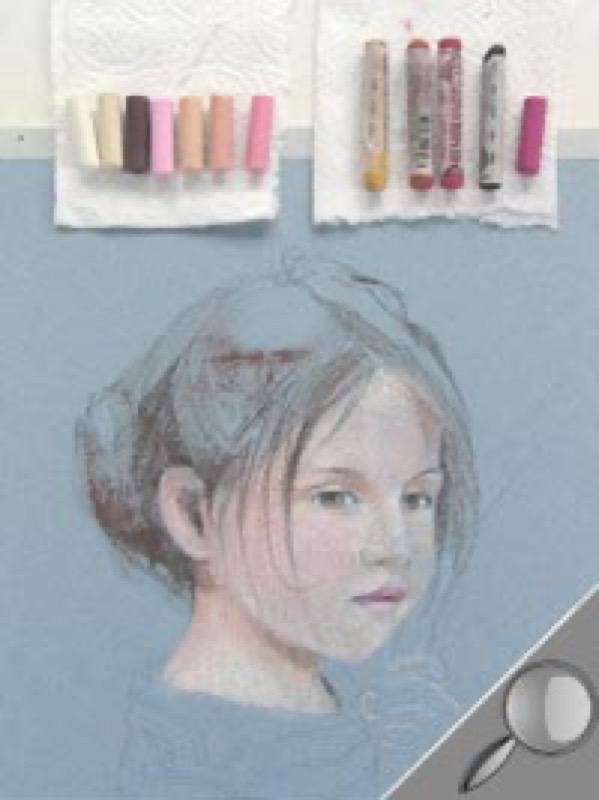
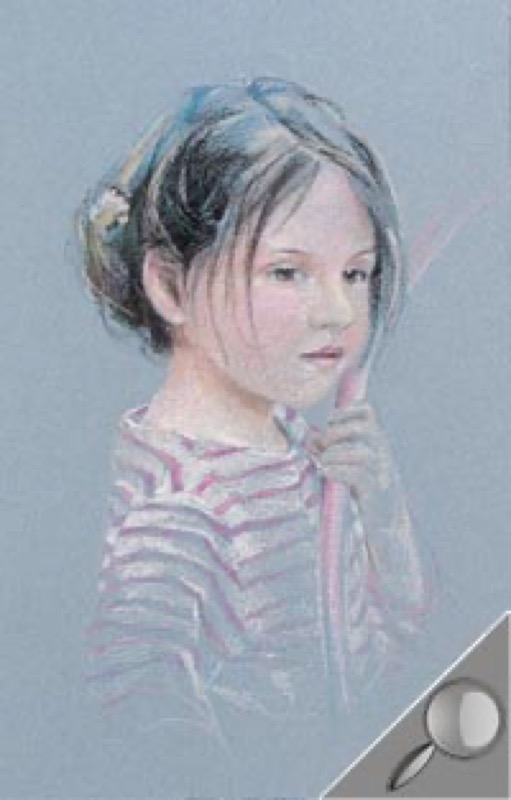
​This exercise is useful for anyone wanting to progress in dry passtels. This portrait was done using the "partial" technique (where colors are applied more and more lightly), an excellent way to learn how to master the interplay of shadow, light and typical pastel colors.

Material

    Paper: Canson® light blue Mi-Teintes®, 160 g/m2, 50 x 32.5 cm format

    13 Half-soft Rembrandt Pastels: burnt sienna (411.9), burnt umber (409.5), white, black, yellow ocher (227.9), dark yellow (202.9), Venetian red (339.7), Prussian blue (508.7), blue green (640.7), crimson (318.8), permanent rose (397.7), red violet (545.5) 

    Accessories: 1 roll of paper towels, 1 sheet of tracing paper.

    Step 1

    Adding lights.

    Once you have traced the model (make sure not to use graphite: it keeps colors from adhering. Use a pastel in a color that harmonizes with the paper's. Here: blue), indicate the light areas with white pastel. Apply it as though you were drawing lines with a pen: go lightly (and do not add too much pigment), to keep from saturating the paper too fast.

    Step 2

    Showing the skin complexion.

    Apply a first layer of burnt sienna to the face and neck. Add crimson to the cheeks. Do not add too much color.

    Step 3

    Define the forms.

    Use the dark burnt umber to define the contours: face, neck, and pullover. Also color in the eyes, eyebrows and part of the hair.

    Step 4

    Stumping the colors.

    Combine the colors by blending them lightly with the ends of your fingers. Note: dry pastel colors tend to get each other dirty. You can use several fingers (one per color area). Remember to wipe them off if you go over the same area several times.

    Step 5

    Handling contrasts between shadows and light.

    - Temple and neck: go back to all the pale colors and add them one by one.

    - Mouth: add red violet to the upper lip, and permanent rose to the lower lip. Highlight them by adding white around the mouth. 

    - Below the nose: just a light shadow with yellow ocher on top of the burnt umber.

    - The eyes: This is the most delicate area, because you are working on a tiny surface! Add black for the iris.  Lightly add umber lines to redraw the upper eyelashes, eyebrows and pupil. Add a few specks of white to the eyes: This brings the eye to life.

    - The hair: draw a few strands and the back of the head with black.

    Finish by stumping each area very lightly.

    Step 6

    Work on the hair and touch up the facial features.

    Add burnt umber and black, stumping each shade very lightly. Harmonize the facial features with the hair by doing a little retouching with umber to the eyes, nose and mouth.

    Step 7

    Liven up the hair.

    Use Prussian blue: black would make your finished product heavy. This makes for better cohesion between the face, hair and color of the support…

    Step 8

    Doing the rest of the figure and adjusting colors.

    Finish the hair off with some specks of dark yellow, white and blue green. Work on the rest of the partial figure: tee shirt, hand, and hoop.

    Add white to the tee shirt, hand, arm and hoop: the lower you go, the lighter your touch should be.

    Add burnt umber the same way to the arm and hand.

    Add each pink, from lightest to darkest (crimson, permanent rose and purple pink).

    Subtly soften the shading with blue green: hair, hands and hoop.

    Recommended product:
    Mi-Teintes®