Materials required:
- Canson® The Wall pad
- Pencils
- Alcohol markers
Materials required:
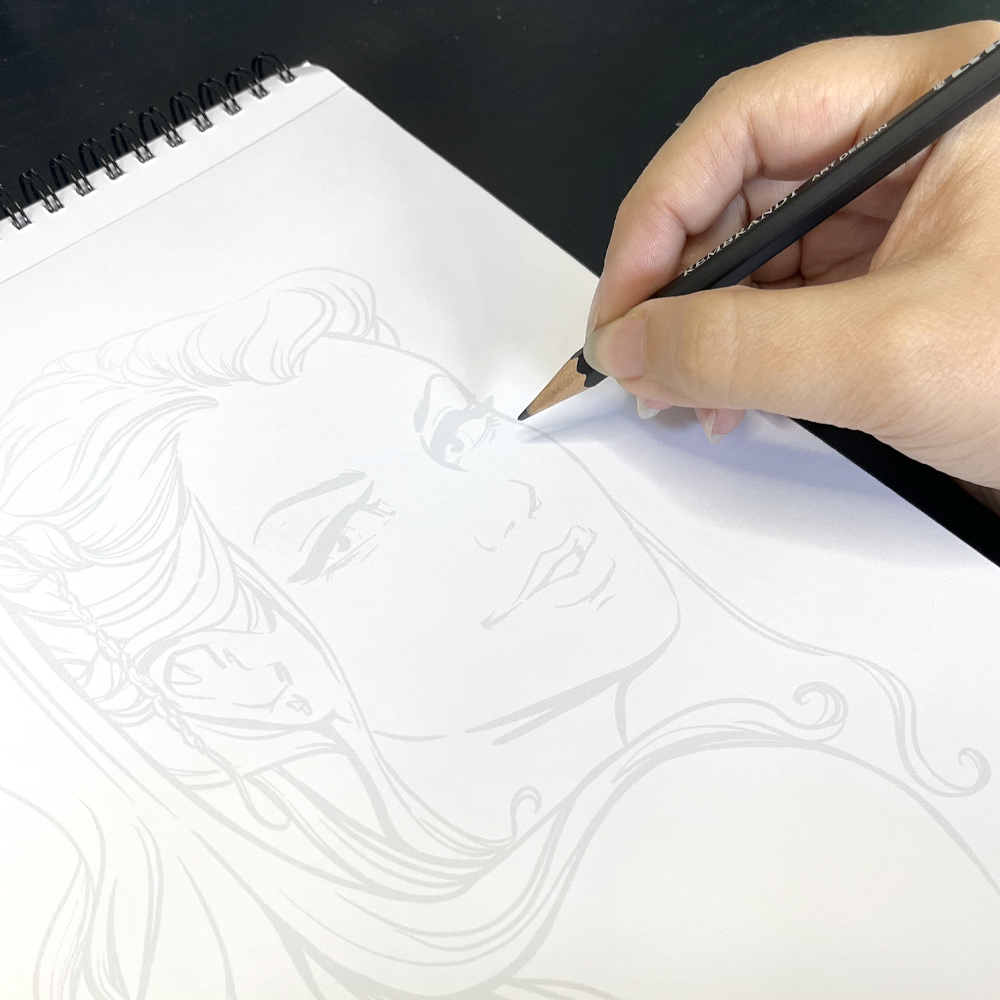
You can work with the Canson® The Wall pad to sketch the composition lightly using a dry pencil. Without applying pressure, place the simplified shapes, looking for balance and determining the space the drawing will occupy on the paper.
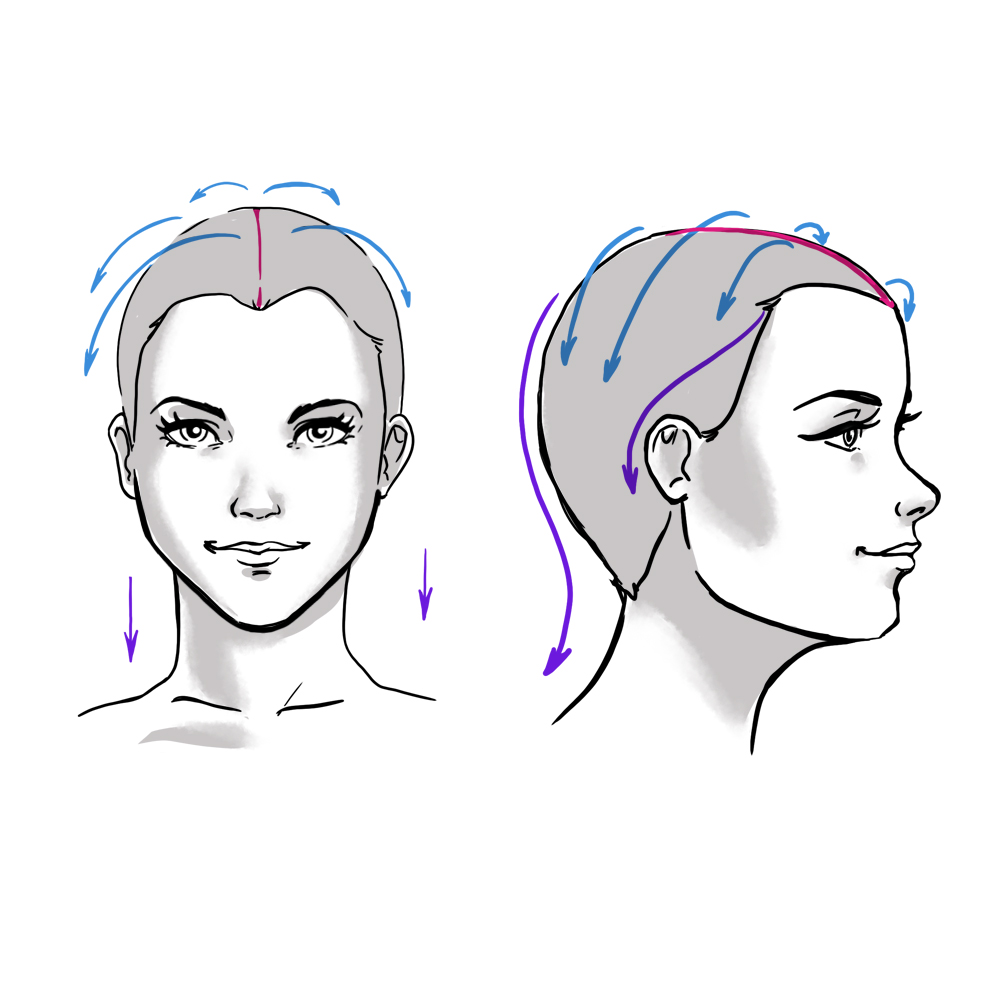
The guides act as aids to help place the different volumes. These lines should be light, as they will not be kept. This way, you can position the facial elements, hairline, and hair parting.
Pro Tip: Taking the time to construct your drawing is essential. It may seem tedious as it takes time, but it allows you to understand what you are doing. It is necessary because it is the key to a successful, balanced and harmonious design.
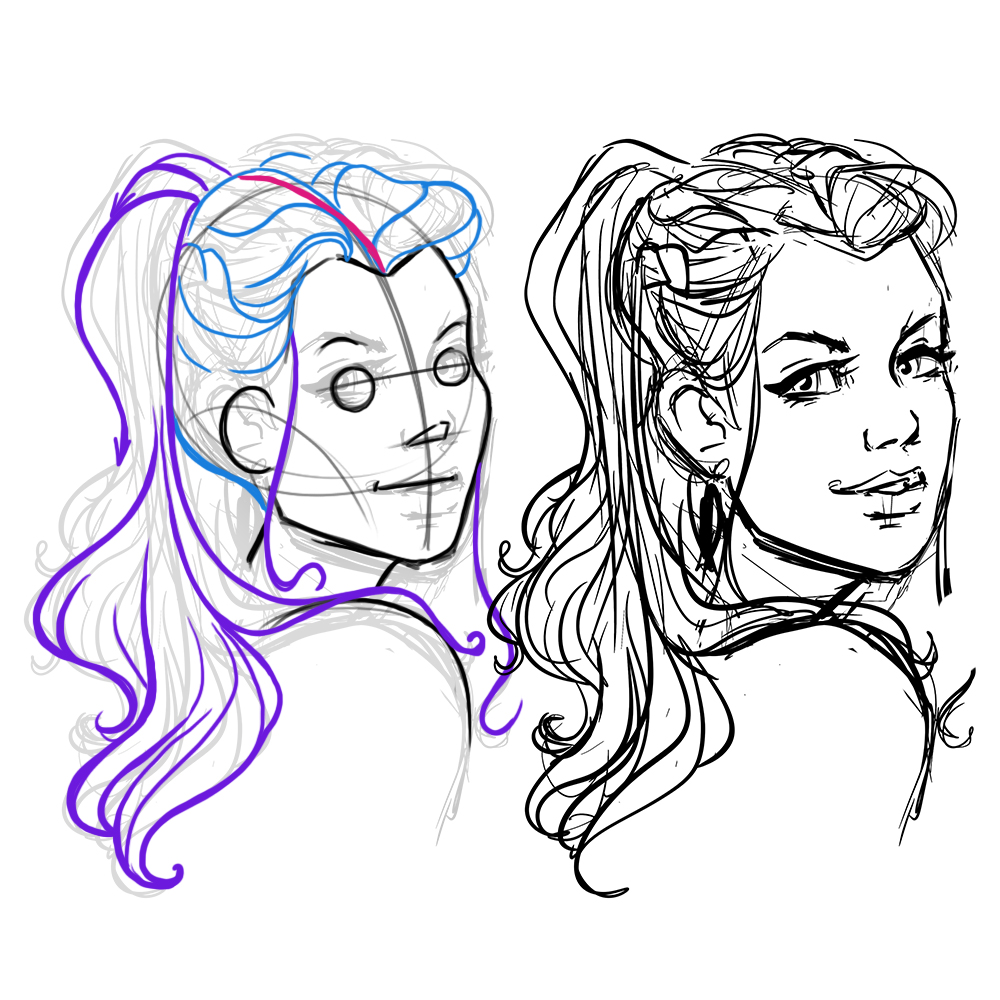
Once the structure is in place, you can add the hairstyle, taking care to work in volume. This stage allows you to think ahead and understand how to colour it. Hair is not glued to our head. There is space between the strands and layers of hair that accumulate to create volume. To maintain coherence, be sure to take into account the weight of hair accessories or fastenings that hold it. Consider the type and volume of the hair: straight, curly, frizzy...
Straight black hair gives a serious and elegant look, while curls are warm and welcoming.
Tip: You do not need to draw each hair strand. They can be grouped into locks. The volumes will then be more visible.
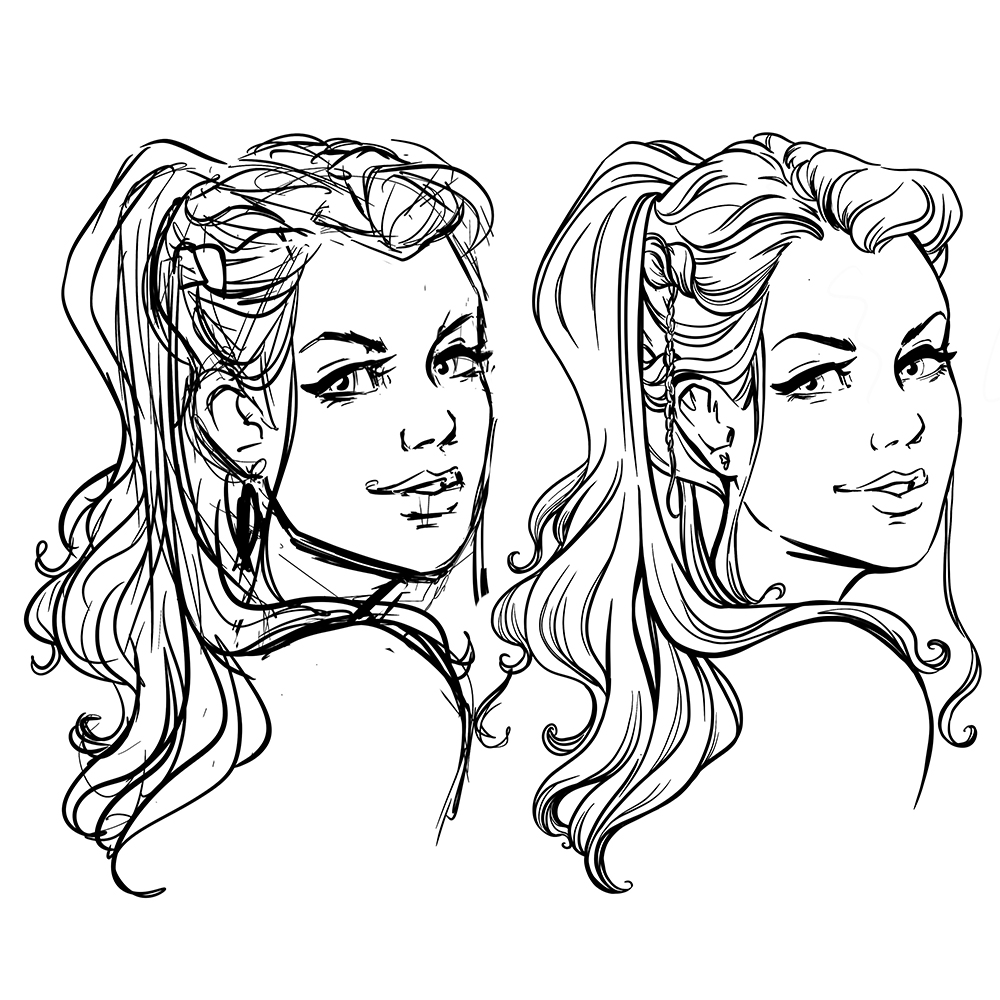
Take your time, add details while thinking about volumes, and have fun with lines and curves. The finishing of the structure is the most creative part.
Before grabbing your marker, make sure you erase any lines you don't want to keep. If you go over the pencil with the marker, you risk greying your colour. Once you've covered the pencil, you won't be able to erase it.
Tip: You can make a photocopy of your drawing so that you can keep the one you've spent time on and do colour tests. Another option is to trace your drawing using tracing paper or a lightbox, keeping only the clean lines of your illustration and avoiding damage to the paper from erasing.
Choosing the primary light source will bring coherence to your drawing and is important for representing volume. Identify the areas of shadow and light to shape the hairstyle. Start with the lightest colour. You can leave some areas in reserve for a brighter finish. Brightly lit areas are left white.
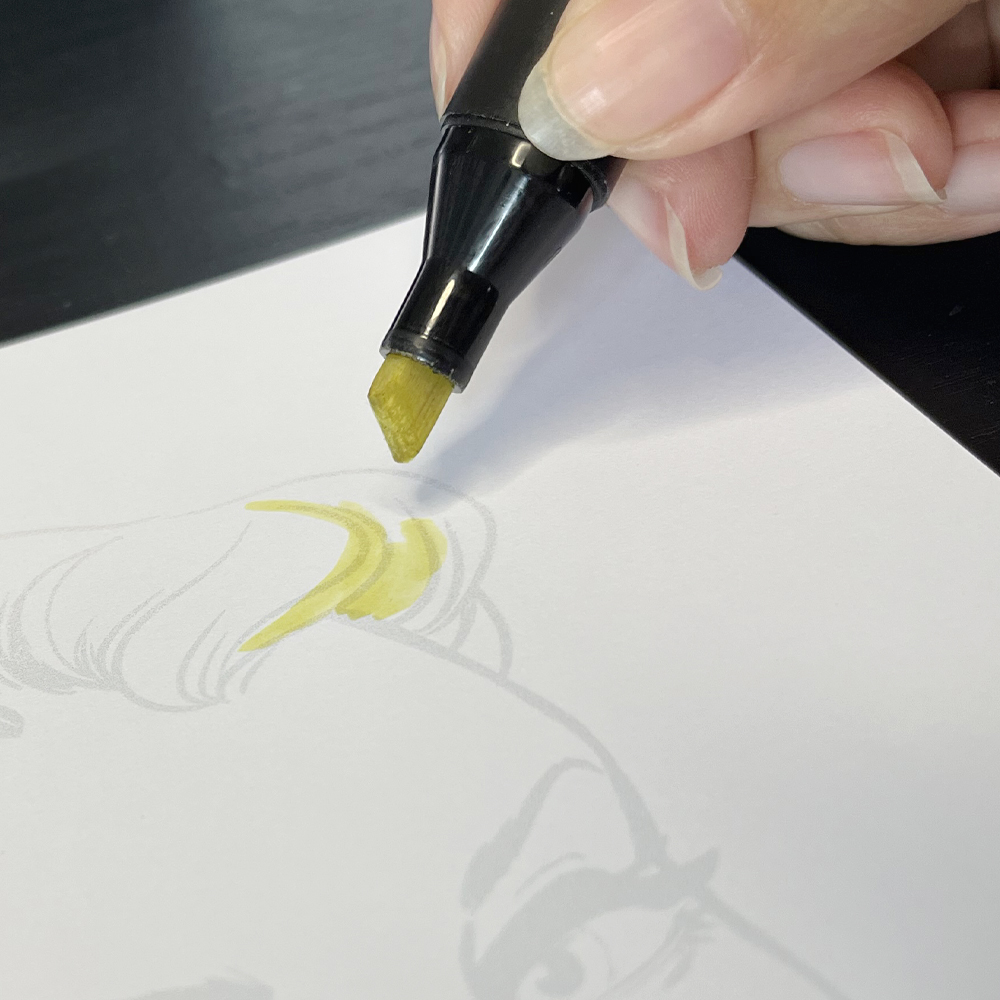
To begin with, choose a pale colour.
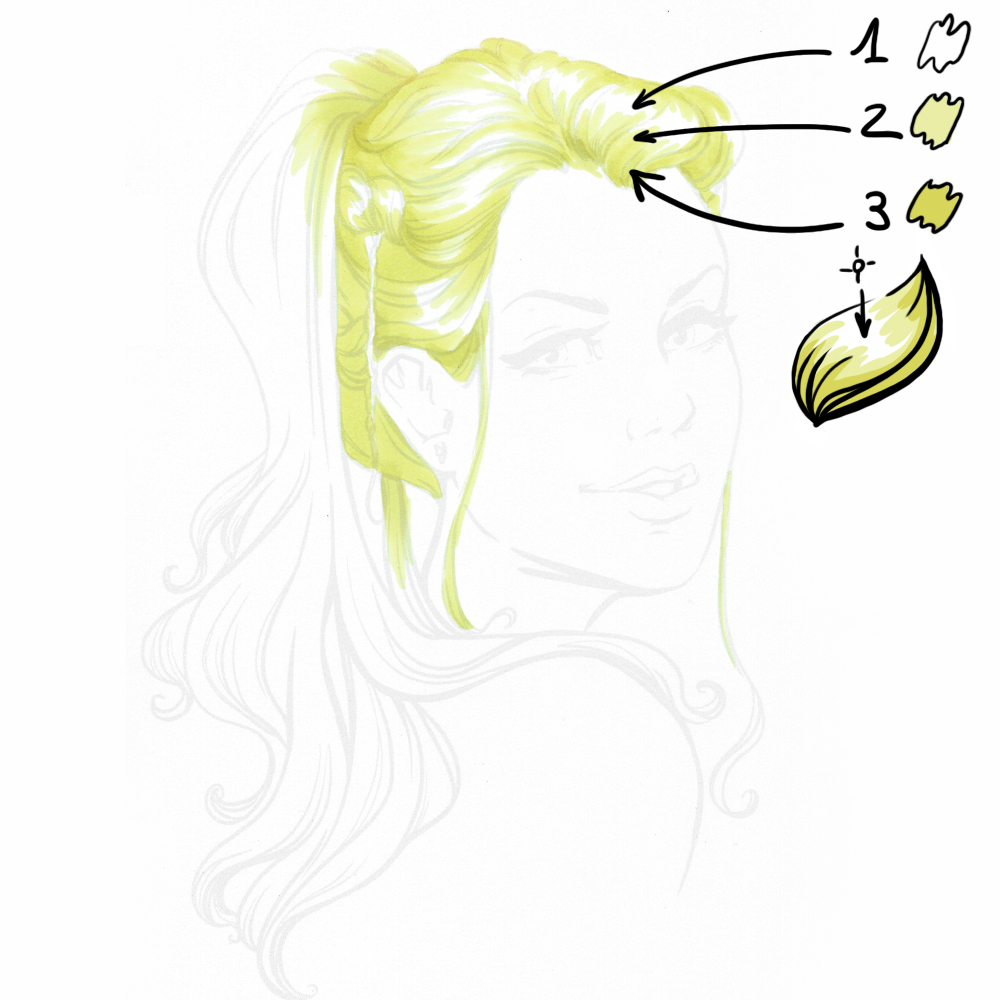

Apply the colour in layers.
By layering the colour, it will become more pigmented and darker. Vary the shades with similar colours. Start with the roots and work towards the tips.
Example of building colour from light to dark.
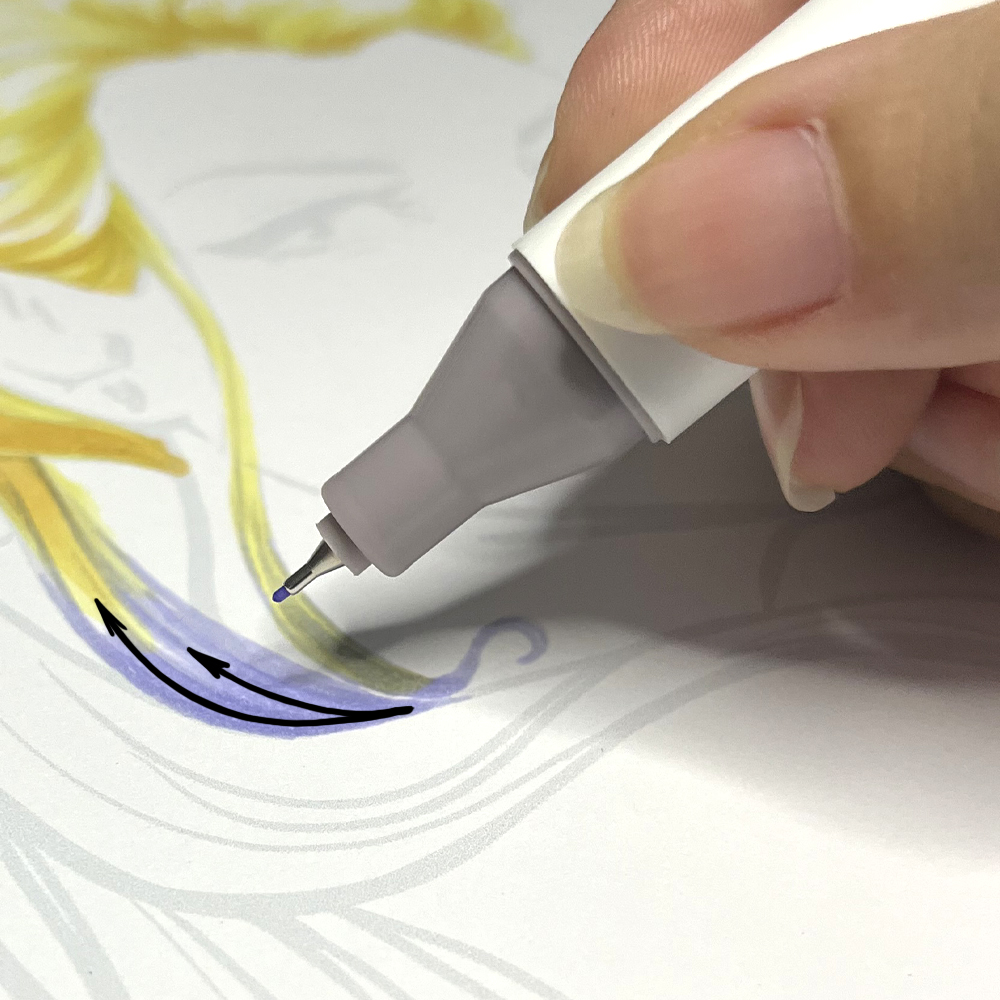
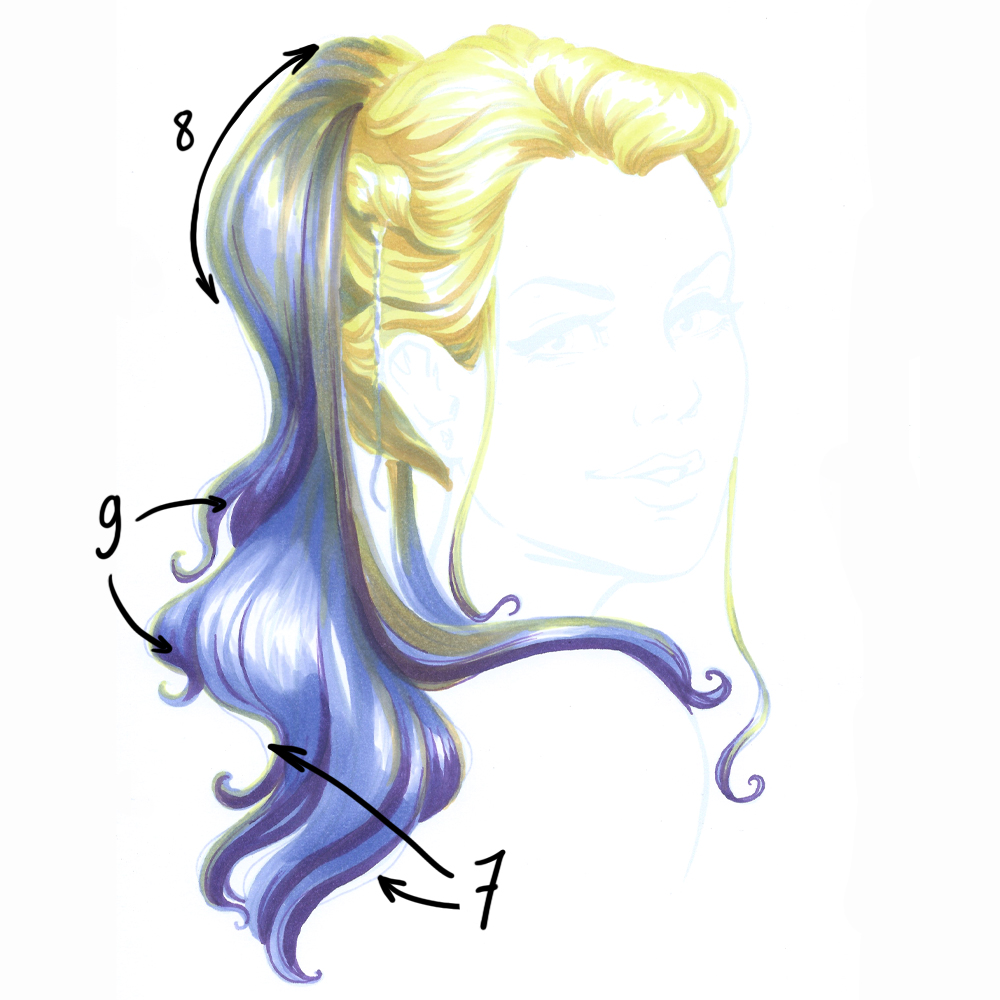
For a more organic hairstyle, you can play around with a few stray hairs to add some realism. You can also play with other colours to add a touch of fantasy to your hairstyle. The colour used here is violet. To harmonise the transition, I blend the colour from the tips of the hair upwards. Overlap the colours, respecting the volume of the locks.
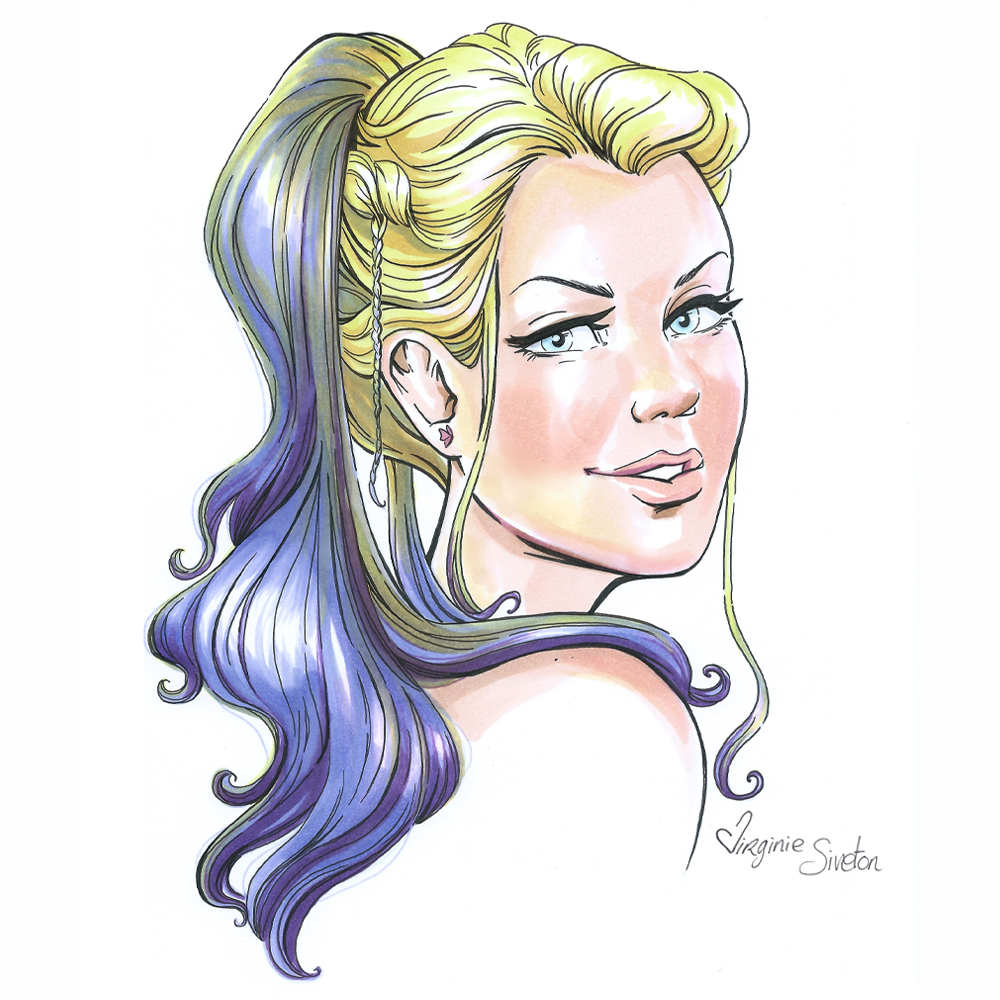
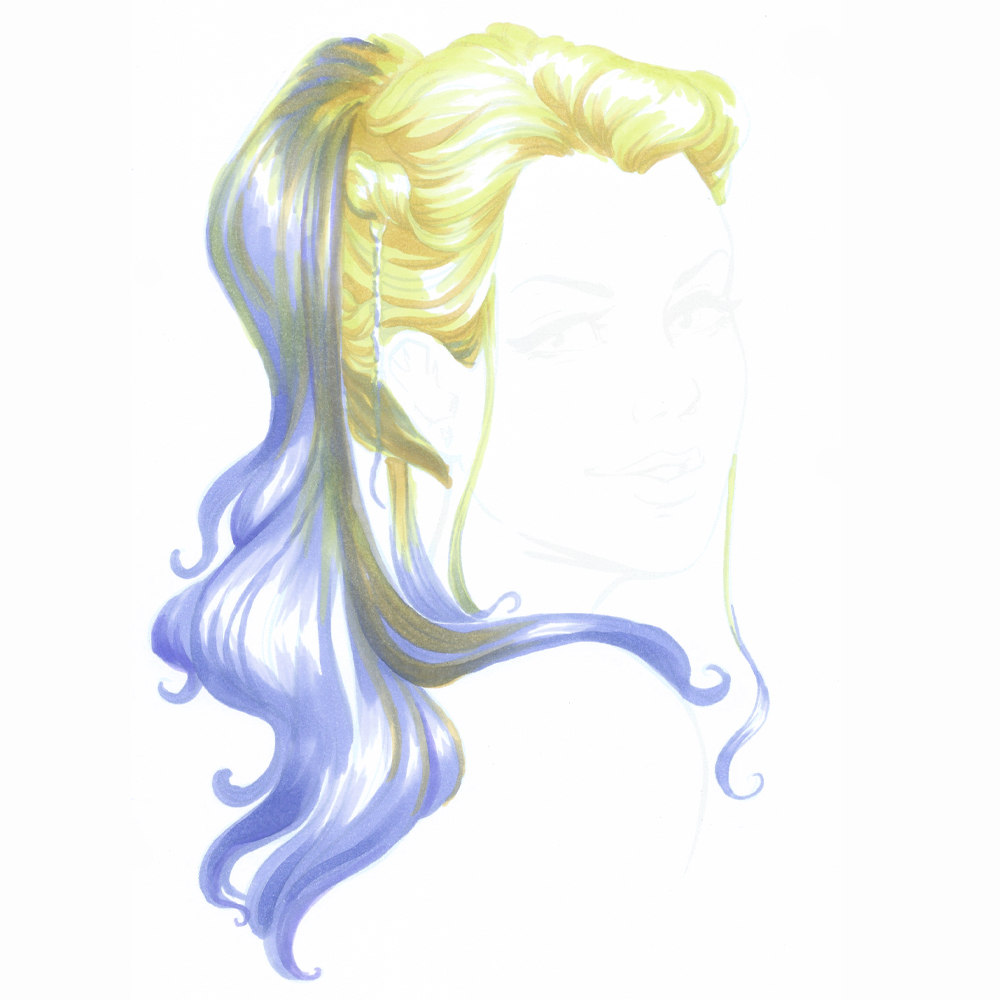
Use a light yellow shade to provide a colourful glow to harmonise the whole hairstyle and set off the character's silhouette.
Then add contrast with a darker shade in the areas that will be in shadow.
Add a coloured backlight. As with the yellow highlight, you can combine a cool light to give the drawing more volume, on the opposite side to the light source.
Finish your illustration with thicker lines on the side opposite to the light. You can detail the locks of hair with finer strokes as you wish.